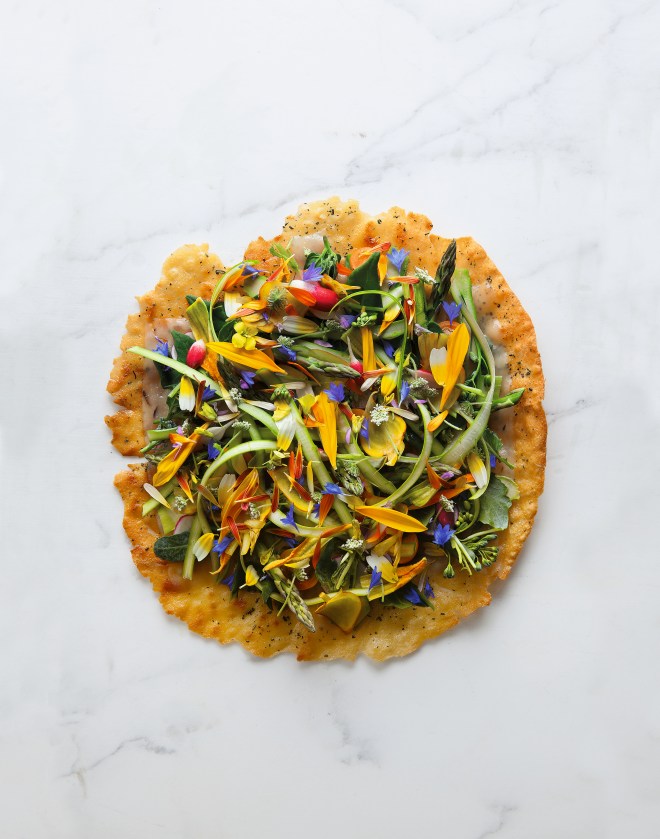
When I worked at Mumbo Jumbo in Atlanta, Georgia, we used to purchase ready-made Sardinian flatbread (also called carta da musica). On its own it’s not that tasty, but brushed with olive oil and toasted, it turns into something great. Whenever we had a VIP in the restaurant we would send it out topped with herbs and truffles—and the like—and I always dreamed that one day, if I had a pizza oven, I would start making these myself. When I opened Ubuntu I got to do just that, and as a result, this was probably my favorite dish on the menu. It is basically a vehicle for everything great that we happened to have on hand. Just for fun, and despite Ubuntu being a vegetarian restaurant, we always served it on a pig-shaped wooden board.
NOTE For the “leaves and things,” I like to use pea tendrils, nasturtiums, calendula, young beet (beetroot) greens, fava (broad bean) leaves, parsley, shaved carrots, and shaved radishes. But really whatever is seasonal, fresh, and sounds good to you will work great.
Once the carta da musica is dried out in the oven, it will keep for a very long time—so that step can be done very far in advance.
makes 8
carta da musica
1/2 teaspoon active dry (fast-action) yeast
1 3/4 cups (220 g) durum wheat flour
1 teaspoon kosher salt
extra-virgin olive oil for greasing the bowl
all-purpose (plain) flour, for dusting
to serve
assorted leaves, herbs, and shaved vegetables (see Note)
1 pound (455 g) boschetto al tartufo cheese (or aged pecorino or parmigiano-reggiano)
extra-virgin olive oil, for brushing
1 tablespoon chopped rosemary
1 1/2 teaspoons chili flakes
kosher salt
lemon wedges
flaky sea salt
Fill a 1-cup (240 ml) measuring cup (measuring jug) with 2⁄3 cup (160 ml) warm (105° to 115°F/40° to 46°C) water, sprinkle in the yeast, and stir it to blend. Let stand for about 10 minutes to activate the yeast.
In a stand mixer fitted with the paddle attachment, combine the flour and kosher salt and mix on low speed to blend.
With the mixer running, pour in the yeast/water mixture, increase the speed to
medium, and beat the dough until it is smooth and elastic, about 4 minutes. The dough will be slightly sticky to the touch.
Lightly coat a medium bowl with the olive oil. With your hands lightly oiled as well,
shape the dough into a ball and place in the bowl. Turn the dough ball over so that it is coated all over with the olive oil. Cover the bowl with plastic wrap (clingfilm) and let the dough proof in a warm area for around 2 hours—the dough will rise very slightly, but will not double in volume.
Once the dough is proofed, place a pizza stone on a rack positioned in the center of the oven and begin preheating the oven and stone to 500°F (260°C/Gas 10). Give the stone at least 1 hour to preheat so that the carta will cook evenly and consistently. (Although a pizza stone has much better heat retention and will create a superior product, you can also use an 18 x 13-inch/46 x 33 cm baking sheet. Stick it in the oven upside down; this gives you a flat surface with no lip, making it easier to lay down and remove the dough.)
While the oven and pizza stone are preheating, roll out the dough. Sprinkle some flour over a work surface. Divide the dough into quarters. Working with one piece at a time while keeping the others covered, use a rolling pin to roll out the dough to an 8-inch (20 cm) round, about 1⁄16 inch (1.5 mm) thick. The round doesn’t need to be perfect, but it does need to be of consistent thickness and of an appropriate size to fit on your stone. But most important, it needs to be totally flat. If the rolled-out dough has any tears or crimps, it will not inflate, and thus won’t cook properly.
Rest the rolled-out dough on a floured baking sheet or work surface for 30 to 45 minutes.
Dust flour over a pizza peel or an upside-down 8-inch (20 cm) tart pan—you’re going to use this to slide your dough rounds onto the stone, so the flour helps keep the dough from sticking to the peel. Transfer the dough round to the pizza peel or tart pan and give the peel a light shake to ensure that the dough can move around.
Open the oven door and bring the peel in flat, over to the far edge of the pizza stone.
Tilt it up slightly—but don’t let it bunch up—and jostle the peel gently until the edge of
the dough round hits the far end of the stone. The dough will immediately catch on the stone, so you should be able to pull the peel back at a flat angle, leaving the dough on the pizza stone with no wrinkles or crimps (that last part is, again, important to it cooking properly). Immediately close the oven door to maintain temperature.
The dough should puff up and fill with air in 2 to 3 minutes. The carta da musica is done when it is puffy, hollow, and dry to the touch. Remove it from the oven and let it cool for 5 minutes. Repeat the process with the remaining dough rounds.
After an initial 5-minute rest, use scissors to cut around the outer seam of the carta (like a pita), carefully peeling back the top layer from the bottom to remove the two layers into separate round sheets. The layers toward the center may want to stick a bit, so use extra care when peeling it apart. You should wind up with two disks of even thickness.
As the breads are baked and separated, stack the sheets cut-side down. Once the last piece of dough is baked, reduce the oven to its lowest setting, ideally below 200°F (95°C). Remove the pizza stone.
Once your oven has cooled down, place the cut rounds, cut-side down, directly on the oven racks in single layers (you can use multiple oven racks) and let the bread dry out until completely crispy, at least 2 hours.
Once dry, the breads can be stored indefinitely in an airtight container. Just continue to store them cut-side down, as the cut-side is not as pretty or even, and will be kept face down when you assemble the finished dish.
to serve
Preheat the oven to 500°F (260°C/Gas 10).
Prepare the leaves, herbs, and vegetables. These can be as rustic or precise as you like, but the real goal is to have things that will be delicious to eat raw, on top of crispy bread.
Place the carta da musica cut-side-down on an 18 x 13-inch (46 x 33 cm) rimmed baking sheet (tray)—it is rimmed to keep the olive oil from leaking onto the oven floor and burning.
Meanwhile, using a vegetable peeler, peel around the perimeter of the wheel of
Boschetto al Tartufo—the goal is to have as long of a peel as possible. Brush the bread disks evenly and generously with olive oil. Sprinkle with the rosemary, chili flakes, and kosher salt to taste. Bake the carta until they are golden brown and crisp, about 2 minutes.
As the disks come out of the oven, pour off any excess oil that has not been absorbed and immediately drape the cheese over the surface so it starts to melt from the residual heat. Place the carta da musica on a plate and dress it with the prepared herbs, greens, flowers, and vegetables. Finish it with a squeeze of fresh lemon juice and flaky sea salt.
Eat this immediately—and with your hands. Basically, just have fun.
Cook more from this book
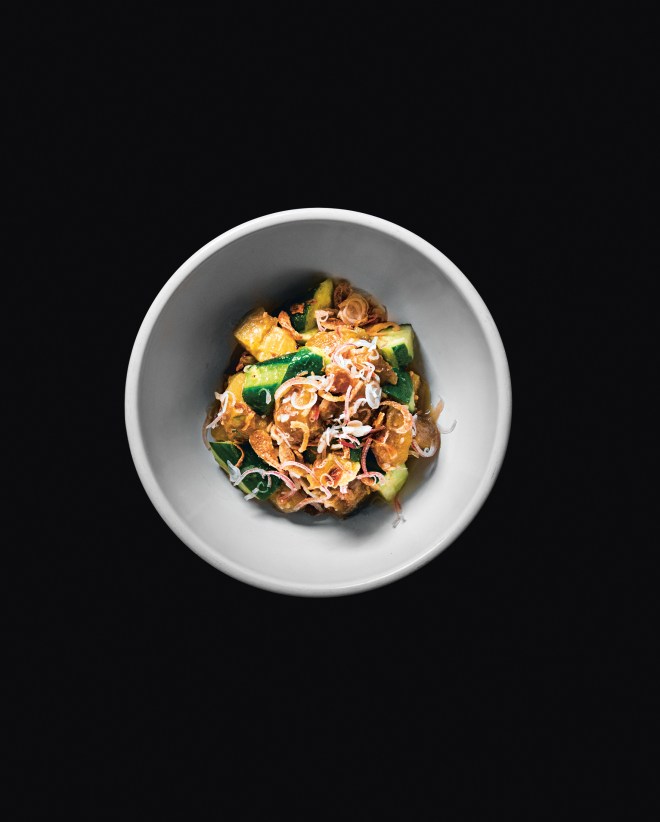
Lima bean and sorrel cacio e pepe
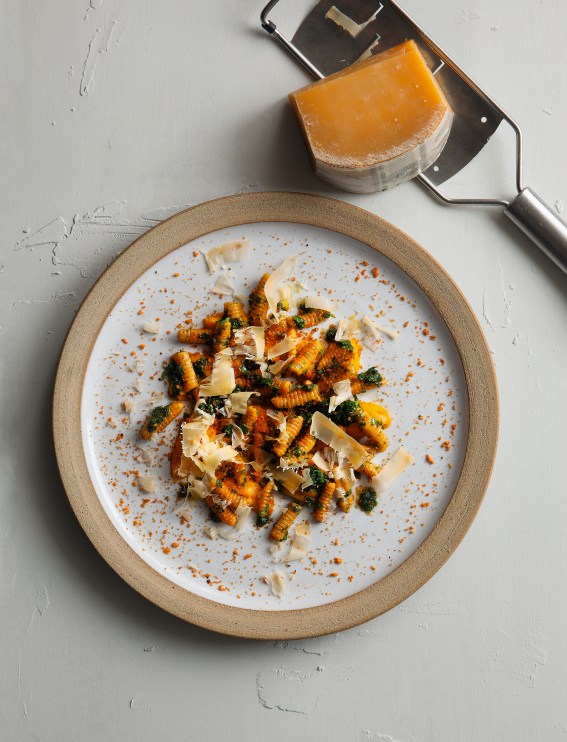
Carrot juice cavatelli, tops salsa and spiced pulp crumble
Buy this book
On Vegetables: Modern Recipes for the Home Kitchen
£29.95, Phaidon
 Lima beans, also known as butter beans, are probably my favorite shell bean. Fun fact: When I put this dish on the menu at Rustic Canyon with the name “lima bean,” nobody buys it, but when I list it as “butter bean,” it sells out and everybody loves it.