What’s the USP? The publishing phenomenon that is Yotam Ottolenghi returns with a seventh volume of his signature Middle Eastern-inflected food but this time, with colour-coded, simplified recipes for cooks who are short on time or just plain lazy.
Who’s the author? Ottolenghi is a world-famous cookery writer and restaurateur who has almost single-handedly brought Middle Eastern cuisine into the mainstream (although he would no doubt acknowledge the importance of ground-breaking writers such as Claudia Roden who wrote the definitive Book of Middle Eastern Food back in 1972). He runs NOPI and ROVI restaurants in London, alongside a group of four Ottolenghi deli’s dotted around the capital. He has filmed two series of Mediterranean Feasts for Channel 4 and Jerusalem on a Plate for the BBC.
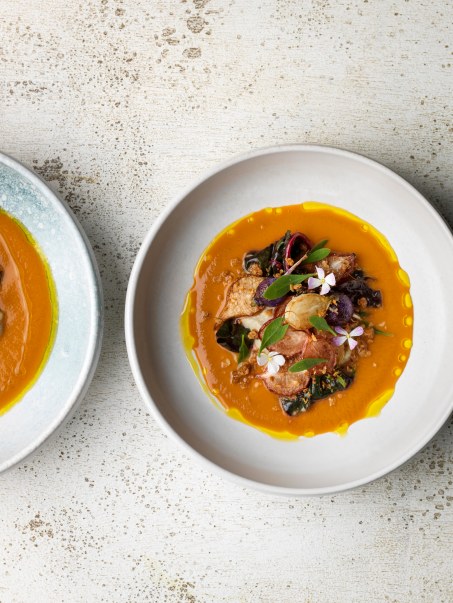
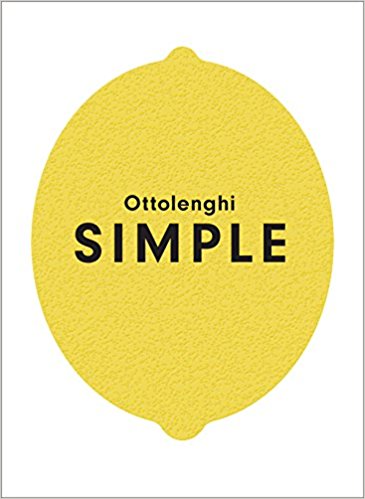
What does it look like? Colourful. From the big lemon on the cover to the bright chapter headers (aubergine purple for Cooked Veg, marine blue for Fish, each accompanied by a charming graphic) and of course the always vibrant, multi-hued food, the book will bring a little ray of sunshine into your kitchen whatever the weather outside. And then there’s the six-step ‘traffic light’ recipe colour-coding using the acronym SIMPLE – an orange ‘S’ for ‘short on time’, a yellow ‘I’ for ‘ingredients: 10 or less’, a green M for ‘make ahead’, a blue P for ‘pantry’, a light green L for ‘lazy’ and a red ‘E’ for ‘easier than you think’.
Is it good bedtime reading? This is a straight up recipe book with an introduction that explains how the colour coding works and short recipe introductions that are often breezy, chatty and mostly about serving suggestions or alternative ingredients. A book for when you are looking for inspiration to cook rather than recreational reading.
How annoyingly vague are the recipes? Ottolenghi has been good enough to credit his two co-authors, food writer Tara Wigley and chef and recipe tester Esme Howarth and, between the three of them, they have produced a book of carefully written recipes that even give weights for herbs instead of ‘bunches’ or ‘handfuls’ and unusually, specify many ingredients by both number and weight, so you know for example that 2 small onions should equal about 250g. It’s a very useful and practical feature and one that should make the book particularly appealing to less confident cooks.
Will I have trouble finding ingredients? You shouldn’t have any problems tracking down everything you need, but if you do get stuck, good old Ottolenghi has his own web store, stocked with everything from black glutinous rice to dried sour cherries that will get you out of any purchasing hole. Handy eh?
What’s the faff factor? For a book titled Simple, there are a fair-few long ingredient lists and complicated methods.
How often will I cook from the book? Simple is one of those rare cookbooks where you’ll want to try every recipe so there’s no danger that it will sit sad and unused on your shelf.
Killer recipes? Standouts include gem lettuce with herby avocado and tahini ‘fridge-raid’ dressing that is bound to become part of your standard repertoire, and a wicked hazelnut, peach and raspberry cake that’s a cinch to make but tastes like your pastry chef sweated hours over it.
What will I love? The useful directory of ‘Ottolenghi’ ingredients like sumac, za’atar and urfa chilli flakes that help define his cooking; the meal and feast suggestions that will help you plan your cooking, and the book’s upbeat, approachable style. A unique code is printed at the back of the book which gives access to a fully searchable online version of Simple which means you can cook from the book via your phone or tablet (or laptop) when you are away from home (or even if you are at home but don’t want to get pomegranate molasses stains on the pages of your beautiful new cookbook).
What won’t I like? Although the SIMPLE colour coding is a nice conceit, I’m not convinced of its practical use. A more straightforward indication of time to prepare and cook the dishes would be more useful in deciding which recipe to cook on any given day. And not all the recipes are even that simple; slow cooked chicken with a crisp corn crust for example has 16 ingredients and requires you to separate eggs, whisk up the whites and fold back into a corn batter to make the crust, in addition to a two-stage cooking process that will take well over an hour and half to complete (that said, the dish does look well worth the effort).
Should I buy it? If you are new to Ottolenghi, this is an excellent place to start and if you are a converted fan then you will want to add this to your collection.
Cuisine: Middle Eastern
Suitable for: Confident home cooks
Cookbook Review Rating: 4 Stars
Buy this book
Ottolenghi SIMPLE
Cook from this book
Braised eggs
Iranian herb fritters
Slow cooked chicken with a crisp corn crust