
The André Simon are the UK’s most prestigious annual awards for food and drink books. This year’s shortlist, comprising seven food and four drink books, sets a new record, with the majority of nominees being female writers (7 out of 11). For the first time, vegetarian books take centre stage, with a record number of three veggie cookbooks. The food category also includes a practical reference guide to the key building blocks of baking, a historical guide to French cheese and a deep-dive into the most controversial original superfood – milk. The drinks books showcase some exceptional, landmark works, from the most extensive history of the Australian wine industry ever written, to the world’s first dedicated guide to perry, pear cider. Here we are focusing on the food book award and shortlist with an interview with this year’s food assessor Lennie Ware and reviews of all the shortlisted food books.
An interview with Andre Simon Awards 2024 Food Book Assessor Lennie Ware

Interview by Stephen Rötzsch Thomas
Lennie Ware is one of Britain’s most atypical food influencers. Where most in the field are brash twenty-somethings making short-form videos for Tiktok and Instagram, Lennie is a London mum who happened to raise a pop star: Jessie Ware. In 2017, the mother-and-daughter team launched a podcast together. On Table Manners, the pair invite celebrity guests to their home for a meal and a conversation. Lennie’s cooking has served as the backdrop for chats with the likes of Keir Starmer, Robert De Niro, Saoirse Ronan and Cher. The podcast’s success led to a popular cookbook and, this year, Lennie joins the team at the Andre Simon food and drink book awards as their food book assessor. We caught up with Lennie to talk about the awards, and her own experiences with cookbooks through the years.
What was the first cookbook you owned?
Oh, god. I don’t know. My mum never used cookbooks when I was growing up – she just did it. I’m Jewish, and Jewish people know how to cook! We’d have chicken soup, matzo balls. Though my matzo balls now are far better than my mum’s. Hers were like little cannonballs!
I remember having a Robert Carrier book, which I think was my first. And then I was given a copy of a Reader’s Digest book called The Cookery Year when I got married. It was wonderful – I still have it. Food wasn’t so much of an art then. It was all about how you made the most of the ingredients.
Do you find that you rely on cookbooks more now – it seems to me that you cook a real variety of things for your guests on Table Manners?
Yes, I do. I subscribe to different online recipe sites – New York Times Cooking, and Feast – and when I know what I want to do I search for it there, or in cookbooks. Sometimes, if I’m being clever, and know an exact dish that I’ve had before, I can recreate it.
I had a culinary disaster at the weekend. I made an Alison Roman recipe – salmon and citrus – and it was absolutely gorgeous. But then I thought ‘I’m really going to show off’, and made chocolate fondant for dessert. I overfilled the pots and it went everywhere.
You released your cookbook with Jessie during the pandemic-
Yes! It was so long ago now. The release was the saddest day. We had a book launch planned, and everything was ready. We had leopard print balloons – my favourite – and Cosmopolitans, but we had to make the call and cancel it on the day. It was right at the end of March, the last minute before lockdown.
When you were writing the book with Jessie, were there any other cookbooks that informed what you were doing?
Oh, no! No, not at all. If I could write any book it’d be Jerusalem (the 2012 book by Yotam Ottolenghi and Sami Tamimi, who each grew up on different sides of the city). I love the whole concept, and the coming together of the two authors. If only we could all write Jerusalem. It was such hard work writing the Table Manners cookbook. I think it almost broke my and Jessie’s relationship for good!
How did you approach your work assessing the food books for the Andre Simon awards this year?
I have all these cookbooks in my room now – I look like a hoarder! They started coming in dribs and drabs, and I would look through each of them, making note of the ones I liked so I could go back to them. My longlist was more than thirty books long! I’ve been very interested in how many vegan and vegetarian books there have been. I’m known for being very anti-vegetarian on the podcast sometimes! But it’s something that I – that we all – need to get better at. I’ve really been enjoying going through those.
Some books are harder than others to assess. There are books from specific restaurants – for specific cuisines that I’m not very knowledgeable about. It’s hard to evaluate when you don’t have a reference to the food they’re covering. I love so many of the books, though. I’m going to keep all the ones that made my longlist. All of the books in both the longlist and the shortlist are worthy winners. It’s been so difficult choosing.
You must be very familiar with the shortlist by now.
Ned Palmer’s book, A Cheesemonger’s Tour de France, is so cute. The cover is wonderful. And I was already very familiar with Meera Sodha and Anna Jones. When we were making our cookbook we started taking pictures in Anna’s studio before we decided to move the shoot into our homes for authenticity. Sift is fantastic, too – have you seen it?
We have a few of us covering the different books – I haven’t had a chance to sit down with Sift. I already had Easy Wins by Anna Jones and have just been reading through Sunlight & Breadcrumbs.
Oh, I love Sunlight & Breadcrumbs! It’s absolutely beautiful. We had Brandi Carlile on the podcast recently, and I realised she lives in Seattle, where Renee Erickson has all her restaurants. I need to tell Brandi to go to them.
One final question – if you could keep just one recipe from a cookbook, what would it be? Not one of your own – I’m sure that would be your chicken soup and matzo balls.
Yes, it would. That’s an impossible question! I don’t know. I think it would have to be something from Jerusalem, but I couldn’t tell you which without going through the whole book. There are other great recipes I love – when we had Leigh-Anne from Little Mix on the podcast, I made a chicken shawarma that tasted just like when you buy it, and there’s a spiced chicken dish I made Laura Mvula. I make turkey meatballs with parmesan in the centre, that my grandchildren love. But I think it’d have to be a recipe from Jerusalem.
The Food Award Winning Book
Sift by Nicola Lamb

reviewed by Sophie Knox Richmond
Who is Nicola Lamb? Nicola Lamb is a recipe developer and pastry chef famed for hosting sell-out pastry parties with her pop-bakery, Lark!, and collaborating with the likes of the Ottolenghi Test Kitchen, Soft & Swirly and Toklas Bakery. She honed her skills at some of London and New York’s top bakeries including Happy Endings, Dominique Ansel and Little Bread Pedlar, and has seen her work featured in publications including The Guardian, Vogue and ES Magazine. She is also the author of Kitchen Projects (her weekly substack newsletter with over 50,000 dedicated subscribers) where she delves deep into the world of desserts, baking and pastries, sharing behind-the-scenes glimpses of the recipe development process and explaining the ins and outs of what, how and why a recipe works. From the lowdown on the ultimate chocolate chip cookies to how to craft beautifully buttery brioche (not forgetting more adventurous ideas like wild garlic bagels, pistachio gateau basque and caramelised white chocolate, malt and hazelnut spread), it is little wonder the Observer declared it an ‘incredible resource’. SIFT is her debut cookbook.
What is SIFT’s USP? Described as the ‘essential new baking bible’ SIFT promises to take the ‘fear out of failure’ with its collection of over 100 bakes. The first half of the book is focused on theory, featuring key elements and techniques, accompanied by illustrations and diagrams, designed to explore the hows and whys of baking. The second half is dedicated to the recipes, organised by how long you have available to bake, whether that be an afternoon (‘Bread and Butter Pudding with Caramel Mandarins’), a day (‘Rhubarb and Custard Crumb Cake) or weekend (‘Mocha Passionfruit Opera Cake’). Felicity Cloake summed it up perfectly as: ‘Everything you ever wanted to know about baking but were too afraid to ask.’
What will I love? This is the ultimate book for anyone remotely interested in baking no matter your skill level. It lays the foundations for novices to build on and professionals will find inspiring new ideas to develop their own recipes as well as reference points for substitutions.
The first half offers a fascinating look at the main ingredients at the heart of baking (e.g. flour, sugar, eggs and fat) before exploring the techniques that bring them to life (prepare to learn all about texture, colour and rising). The numerous diagrams and ‘technical overview’ help ensure the information remains clear and accessible. Each recipe highlights the techniques used so you can refer back to the theory chapters, identify links between different recipes, and work your way up to more complex ones as you grow in confidence.
Even if you aren’t interested in baking theory, Lamb’s meticulous testing and flair for flavour means the recipes alone are enough to get you grabbing your apron. Expect original sweet and savoury cakes, tarts, biscuits, pies, breads and desserts. Classics like Victoria Sandwich Cake are transformed into ‘Roasted Strawberry Victoria Sponge’, and ‘Baked Lemon Custard Brûlée’ gives Crème Brûlée a zesty modern twist.
Is it good bedtime reading? Lamb’s highly readable writing, coupled with the handy diagrams is likely to leave you staying up into the early hours learning about the ins and outs of ‘starch gelatinisation in action’ and ‘coagulation of eggs’ (I promise you, it isn’t as weighty as it sounds). You can dip in and out at your leisure, focusing on the elements you wish to learn more about at any given time. All the recipes include a short introduction too.
Will I have trouble finding the ingredients? Some fruit purées and pistachio paste might need to be bought online unless you want to make your own (a recipe is included for the latter). Dried hibiscus flowers may also need hunting down but plenty of other sorbet flavours are given instead.
How easy are the recipes to follow? The book is designed for all abilities. Not all the recipes are easy but Lamb has gone to great lengths to ensure they are achievable and the processes are as clear as possible. Each recipe contains a time plan and specifies the equipment and techniques used. There are helpful notes on what to look for at each stage as well as useful tips, shortcuts and instructions on how to prep in advance and/or reheat. It couldn’t be more user-friendly if it tried.
Stand-out recipes? ‘Brown Butter Banana Cookies’ are quick, easy and incredibly moreish, ‘Ricotta, Marmalade and Hazelnut Chocolate-chip Cake’ is a must-make for chocolate-orange fans, and ‘Lemon Basque Cheesecake with Sticky Lemons’ is a beautifully balanced pud for any occasion. Banoffee-lovers shouldn’t miss the ‘Banana Pudding Pie’, and the ‘Tiramichoux’ are utterly inspired and worth the effort. On the savoury side, ‘Olive Oil Brie-oche with Roasted Grapes, Honey and Thyme’ sounds particularly delicious.
How often will I cook from this book? There is something for every mood, occasion and season so you could easily find yourself baking from this all year round, whether you are making a birthday cake for a loved one, a teatime treat to curb mid-afternoon cravings, or a show-stopping dessert for a special occasion. There’s a plethora of savoury delights ideal for lunches and suppers too.
Any negatives? None. SIFT is designed to be the ultimate baking and pastry bible and Lamb has well and truly nailed the brief.
Should I buy the book? A resounding yes. Whether you want to delve deep into the science of the Maillard reaction, or simply want to up your baking game, SIFT is an exceptional book and a must-have addition to your cookbook collection.
Cuisine: Baking and Patisserie
Suitable for: Baking enthusiasts of all abilities
Great for fans of: Ravneet Gill
Cookbook review rating: Five stars
Buy this book:
SIFT: The Elements of Great Baking
£30.00, Ebury Press
The John Avery Award Winner
A Cheesemonger’s Tour de France – Ned Palmer
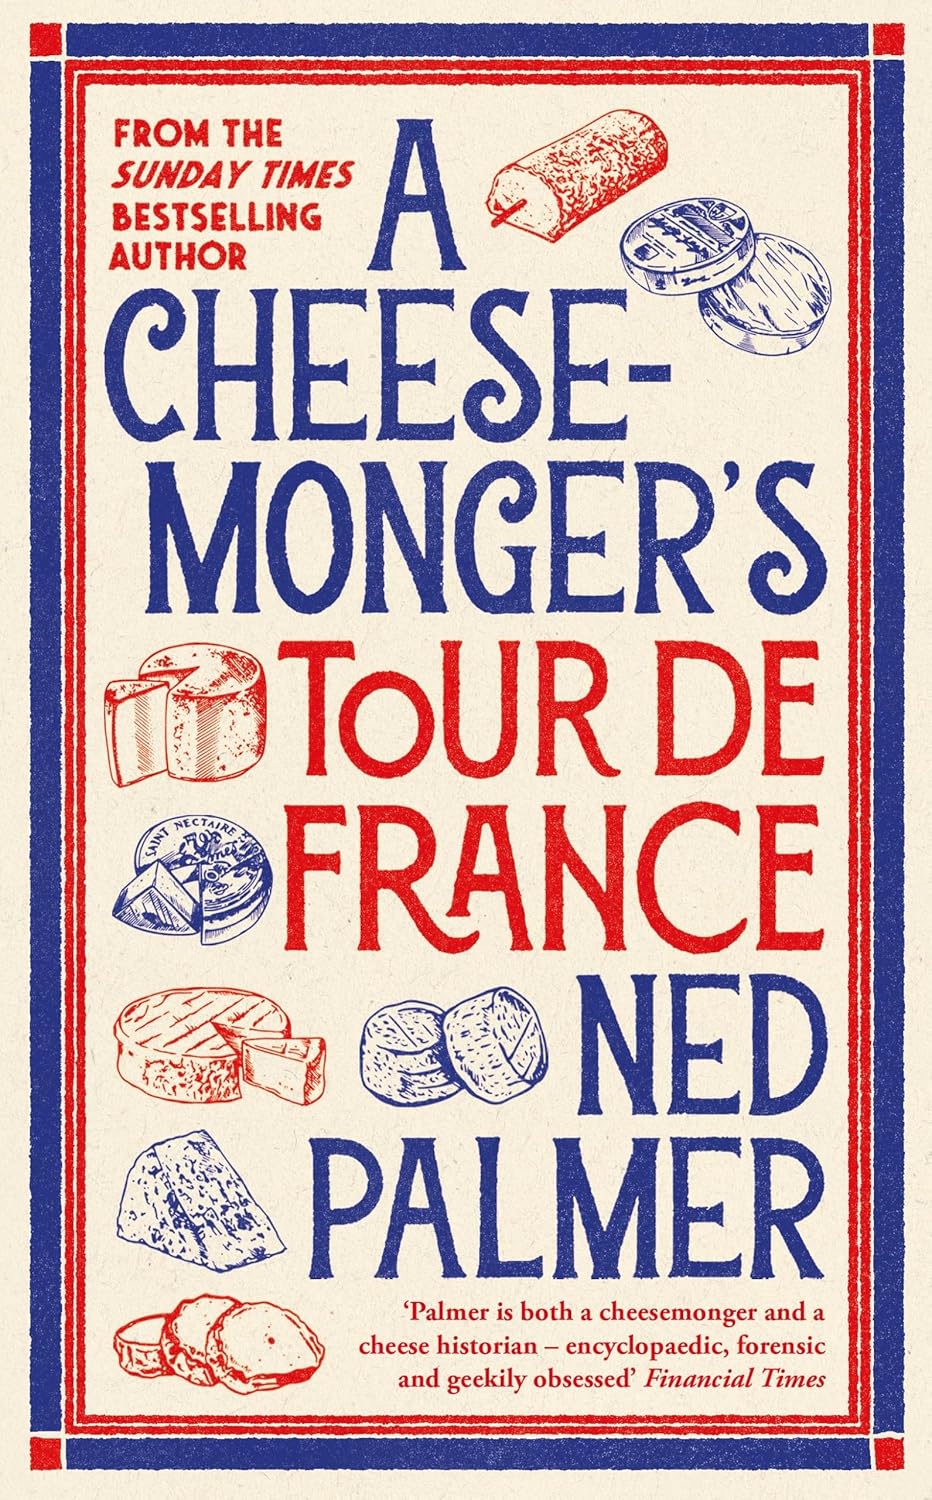
The John Avery Award was awarded to Ned Palmer for his book A Cheesemonger’s Tour de France. In his latest book, the former André Simon nominee wends his way around the country’s regions, meeting remarkable cheesemongers and showing how a French cheese board offers genuine insights into La Belle République. Every French cheese carries a trace of the place where it was made – its history, identity and landscape. Sometimes that’s physical, as the hard texture of Comté echoes its mountainous home in the Jura. Other times it’s about power and politics – Brie swelling to royal dimensions due to its proximity to the French court or Camembert gaining national status after being supplied to First World War soldiers.
Food assessor Lennie Ware said “I absolutely adore this book and have bought it for friends who love France and who love cheese. A tour of France and a guide to cheesemaking of some of our favourite cheeses in different regions of France. Ned’s personal touches are present throughout this travelogue and his vast wealth of knowledge really shines through. I love cheese and this book made me want to head off on a tour de France myself.”
(Full review coming soon)
Buy this book
£18.99, Profile Books
The Shortlisted books
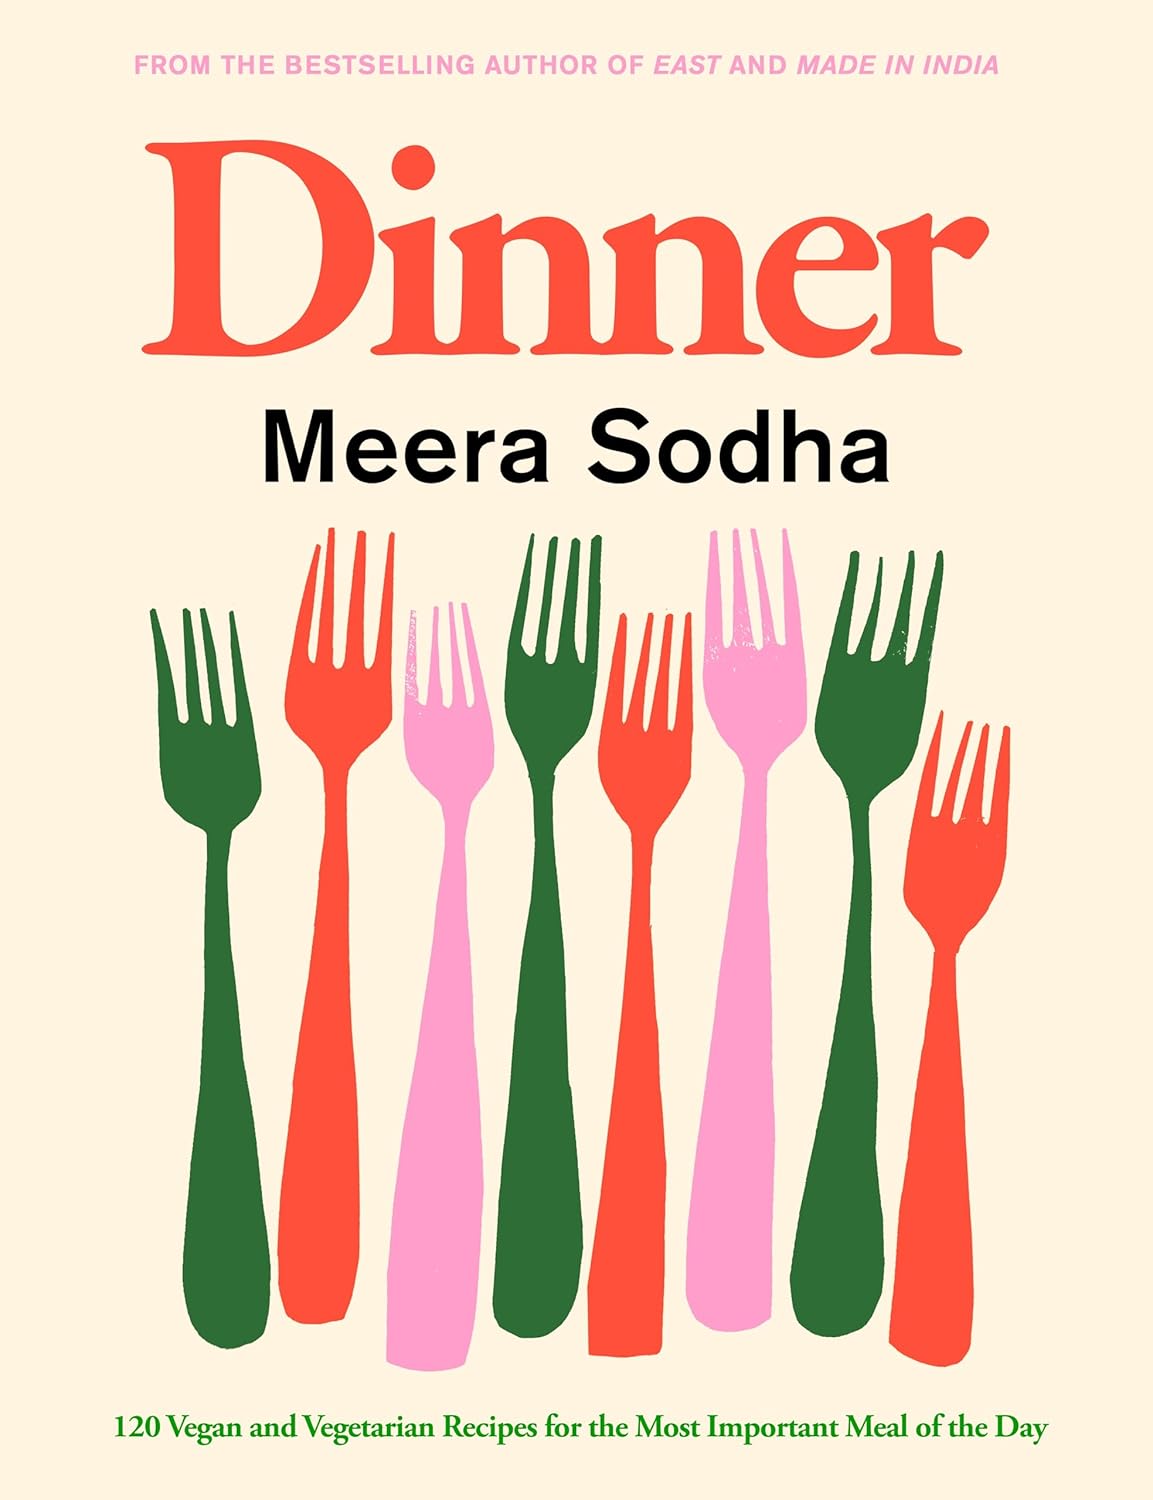
Dinner – Meera Sodha
Reviewed by Nick Dodds
The saying may go that breakfast is the most important meal of the day, but we all know it’s dinner. Breakfast is about function; dinner’s about form. Breakfast has rules and regulations; dinner has ease and abundance. Breakfast reminds you to pack your bags, finish that thing you’ve been meaning to do, and be home by dark. Dinner asks how your day’s been, nods intently, and warms you from within.
Meera Sodha knows this, and so she’s dedicated an entire cookbook, Dinner, to the actual most important meal of the day. It’s Sodha’s fourth cookbook, following East, two Indian-focused books, and her regular column in The Guardian.
Dinner, however, became Sodha’s way of reigniting her love of cooking and food after suffering a breakdown. In the introduction, she writes about her struggles with mental health and losing her passion for food. To aid her recovery, she began cooking for pleasure rather than necessity, viewing her ability to put dinner on the table as a superpower to help her navigate “the darkness.”
Dinner is the collection of recipes that followed this difficult period, and it should come as no surprise to anyone familiar with Sodha’s work that it’s brilliant. I thought East was a masterpiece, and the state of my copy is testament to that: pages stuck together with sauce, bindings frayed at the edges after being hauled from the shelf for the umpteenth time, and errant scraps of paper acting as bookmarks scattered throughout. Dinner is beginning to look much the same way.
Recipes are indexed in three ways: by ingredient, by season, and by type of dish or speed of cooking. I often find myself dipping into the book on these terms, choosing recipes based on the time or ingredients available. And with the exception of an agave syrup here or a brown rice miso there, most ingredients are easily available in supermarkets.
Almost every recipe is worthy of mention. Where to begin? The book is packed with the sort of food Sodha has made her hallmark: diverse, creative dishes from across the globe with vegetables at the centre.
To name a few: the Iraqi White Bean Stew drizzled with coriander and lemon oil; Oyster Mushroom Larb with Sticky Rice; the Baked Butter Paneer; the entire curry section; Aubergines Roasted in Satay Sauce; and Butter Beans in Salsa Verde. Nestled among them are more playful interpretations of familiar dishes, like Pineapple Fried Rice, Marmite Risotto with Tomato and Crispy Chilli Butter, and Vodka Gochujang Pasta.
For me, the standout recipe is the Portobello Mushroom Pancakes with Hoisin Sauce, a dish that perfectly captures what’s so special about Sodha’s food and this book. It’s personal, inspired by her dad buying too many mushrooms; it’s inventive, with homemade hoisin sauce and a clever reimagining of a typically meat-based dish; and it’s a joy to eat – communal, messy, and utterly delicious. Dinner is a compelling reminder of the restorative power of cooking, and this, in itself, feels like a superpower.
Cuisine: International
Suitable for: Beginner home cooks
Cookbook Review Rating: Five stars
Dinner by Meera Sodha
£27, Fig Tree, Penguin Random House
Buy this book
Easy Wins – Anna Jones

This review was written by Freelance Food Writer and Recipe Developer Sophie Knox Richmond. Follow her on Instagram on @sophie_kr_food.
Who is Anna Jones?
Anna Jones is an award-winning cook, food writer and pioneer of modern plant based food. She celebrates the joys of food – with vegetables firmly placed at the centre of the table. In recent years her books have taken a bolder stance on sustainability. In her fourth cookbook One: Pot, Pan, Planet (2021) she dedicated some chapters to educating readers on how to become more eco-friendly. Her recipes take simple, often side-lined, ingredients and transform them into innovative and exciting dishes inspired by cuisines from around the world.
What is Easy Wins’ USP?
Based around 12 hero ingredients (lemons, olive oil, vinegar, mustard, tomatoes, capers, chilli, tahini, garlic, onions, miso and peanuts), Easy Wins promises 125 simple, seasonal, recipes to help you create delicious, veg-centred, dishes all year round.
As Jones explains in the introduction: ‘Simple ingredients, when shown a little bit of love and attention, come together to make more than the sum of their parts. This to me is an Easy Win. A little moment of kitchen alchemy that reassures me. Recipes that are reliable sources of joy in a world that is ever changing.’
What will I love?
A lot. This is a beautiful book full of stunning photography and enticing, ‘cookable’, recipes for every mood and occasion. Jones has made a concerted effort to utilise lesser-known ingredients in several recipes. Instead of asking the reader to buy a whole jar or pot of something only to leave it lingering in the cupboard after one outing, she gives multiple ideas for how to use it up.
Nearly every recipe is accompanied by a photograph which helps give a visual guide for those who like to see what the final dish looks like. Each beautifully shot images manages to be both striking and achievable at the same time.
Flexibility is a running theme of the book; many of the recipes can be adapted for vegans and there are explanations on how to successfully swap ingredients, while still producing a delicious result. Jones includes invaluable advice on how to use flavour and texture to enhance any dish and take your cooking to the next level.
Is it good bedtime reading?
If you are interested in seasonality, eating more sustainably, and learning more about how to make the most out of every meal, then hell yes. There is a personal, heartfelt introduction, followed by ‘Golden Rules for Easy Wins’ and informative guides to ‘Planet-friendly Cooking’ and ‘Salt and Seasoning’. There’s also interesting and useful advice on ‘Vegetarian Flavour Swaps’, ‘How to Cook Flexibly’, ‘Layering Flavour’ and ‘Layering Texture’. The ‘Vegetarian Flavour Swaps’ pages are particularly helpful for those looking to incorporate more meat-free dishes into their diet, with paragraph per recommendation to explain why it works, instead of merely offering a bullet-pointed list.
Each chapter begins with a mini-homage to its hero ingredient, followed by information on different types, complimentary flavours, storage tips and which varieties to buy; useful for experimenting with new recipes even beyond Jones’s book. Sections on ‘Herbs’ and ‘Spices’ provide handy information on flavour profiles, origins, flavour pairings, recommended uses and substitutions.
Will I have trouble finding the ingredients?
Some ingredients, like Amalfi lemons, can be tricky (or expensive) to get hold of, but Jones has gone out of her way to offer advice on substitutions as much as possible.
How easy are the recipes to follow?
Very. Ingredient quantities are listed in the recipe as well as in the ingredient list so you can keep track as you go along. Admittedly there is the usual ‘juice of a lemon’ instead of a specified quantity, but one of the aims of the book is to encourage you to become a more intuitive cook and taste as you go along. The introductions are also genuinely helpful and full of useful anecdotes about each recipe – as well as advice on how to adjust them with seasonal ingredients.
Stand-out recipes?
Where to start? One Pot Pasta al Limone (an ingenious dish which relies on the starchy pasta cooking water to make a creamy, zesty pasta sauce), Double Lemon Pilaf with Buttery Almonds (a sublime combination of taste and texture – worth making for the buttery almonds alone), Double Lemon Cake with Streusel Topping (deliciously moist and refreshing – perfect for pudding or with coffee), Cheese and Pickle Roast Potatoes with Chilli-dressed Leaves (a must-try recipe for anyone who likes big flavours), Chipotle Aubergine Parmigiana (wonderfully smoky and cheesy – can also be made vegan-friendly), Confit Garlic Cauliflower Cheese (a decadent side dish for a special occasion), Lemongrass Dal with Garlic and Curry Leaves (subtly spiced, aromatic and soothing – comfort in a bowl), Miso Rarebit with Asian Herbs (an umami-packed twist on the classic – sure to become a firm favourite) and Peanut Butter Chocolate Chip Cookies (gooey, chocolatey and simply one of the best cookie recipes I have ever made).
How often will I cook from this book?
Keen cooks will find themselves reaching for the book on a regular basis due to the variety of recipes suitable for every occasion. Think mezze sharing dishes like Smoky Aubergines with Tahini and Spiced Tomatoes, easy lunches like Sesame and Chilli Oil Noodles, flavour-packed sides including Corn on the Cob with Caper and Herb Crumbs, simple suppers like Traybake Lemon Dal with Pickled Green Chillies, quick desserts like Miso Banana Caramel Whip (ready in 15 minutes!), comforting cakes like the Double Ginger Cake with Lemon Crème Fraiche, and beautiful breads like Olia’s Pampushky (a garlic and parsley Ukrainian bread traditionally served with borscht).
Any negatives?
This is a plant-based book so a passionate meat eater may feel it’s not for them. However, it’s a testament to Jones’ skill and creativity that none of the recipes feel incomplete due to the lack of meat. In fact, many work as side dishes that could be served alongside meat.
Should I buy the book?
A resounding ‘yes’. Easy Wins is one of those cookbooks that you will find yourself returning to again and again – not just for the recipes, but for the culinary advice. Jones writes with genuine passion and this book feels very personal. Her style is considered, almost conversational; encouraging, never dictatorial. Sustainability-focused cookbooks can be a bit too unattainable, but Easy Wins feels realistic and achievable. This is a guide to Jones’ approach to cooking and one that aims to provide you with the tools to build on the recipes, make them your own and become a more confident, sustainable, cook.
Cuisine: Plant based
Suitable for: Confident cooks and those who enjoy exploring different tastes, textures and cuisines – and have an interest in broadening their plant based recipe repertoire
Great for fans of: Claire Thomson (5 o’clock apron) and Meera Sodha
Cookbook review rating: Five stars
Buy this book: Easy Wins by Anna Jones
£28, Fourth Estate
Milk – Matthew Evans
A powerful, entertaining and, at times, eviscerating commentary on the most controversial of original superfoods.
Milk. It’s in our coffee, on our cereal. We see it in processed form–yoghurt, butter, cheese, skimmed and lactose free. It’s there in almond form, or made from oats or soy, and is as lauded as the ‘perfect’ food or lambasted as not fit for human consumption and a toxic planet killer, depending on who you trust. Which type you drink, whether you were raised on breastmilk, what you think of it, is affected by culture, biology and fashion. How you view it is driven by your gender and your politics, as well as your geography.
The miracle liquid has suffered an image problem. It has been used to keep people poor, to keep women subjugated, and to build corporate and medical careers. It’s been blamed for climate change, the breakdown of human health, and an enabler of the industrial revolution. From perfect food to pariah, milk’s role in life has often been debased.
Milk celebrates the majesty of this noble liquid, and delves into the pretenders to its throne, from formula to Mylk. It looks at the transformation of what a milk-producer eats into one of the most nutrient dense foods available, and how that can be transformed again into the butter, cheese and clotted cream that we know and love today. It’s an exploration of the science, history and politics of what makes mammals different from every other life form on earth.
(Taken from the book’s back cover. Full review coming soon)
Buy this book
£16.99, Murdoch Books
Sunlight & Breadcrumbs – Renee Erickson & Sara Dickerman

Reviewed by Stephen Rötzsch Thomas
What’s the USP? You’ve tried cooking at home. You’ve tried finding fulfillment through creative hobbies like crochet and watercolours. But have you tried exercising your creative muscles in the kitchen? That’s (sort of) the idea behind Renee Erickson’s third cookbook, Sunlight & Breadcrumbs.
Who wrote it? Erickson is a tremendously successful chef who oversees no less than six restaurants (each with distinctly nautical names) in the city of Seattle. But her arrival in the gastronomical world was less than conventional, and Erickson spent her academic years studying art in the city. She began working in a restaurant named Boat Street only as a means to fund her studies. At 25, she was offered the chance to buy the place. That initial dalliance with the art world continues to inform the approach Erickson takes to her food.
Is it good bedtime reading? Short essays scattered throughout the book attempt to tie together the idea of food and art. In one, Erickson contemplates the age-old question of how one can tell when a piece of art, or a dish is ‘done’. The cynics among us might think it’s very easy to tell when a meal is done – the empty plate is usually a good sign. Erickson, of course, is making the case for the perfect composition of the meal, arguing for simplicity. The recipes that follow immediately after include spaghetti with clams, creme fraiche and herbs (surely one of the most over-used combos in cookbooks right now), and very stripped back instructions for a pork loin sandwich that amounts more or less to: put some pork loin in a sandwich with a little mustard, a little onion, and a smidge of garlic. I don’t begrudge the instruction – her ideas make a good combo, and some folks just don’t have it in them to make a good sandwich without being told how to zhuzh it up. The question, though, is will those people be buying a book the purports to celebrate creativity in cooking? If you are incapable of looking at a pork sandwich and thinking ‘what if I add a little mayo’, what hope do you have for a spirited attempt at innovative meal prep?
Here, I think, lies the great fallacy at the heart of this book. Erickson states that ‘at it’s heart, cooking… is a highly personal interpretation of the world around us’, and then offers very specific recipes that represent specifically her view of that world. This might work better if there were clearer lessons in creativity to take away: techniques that open up new possibilities, ideas on how to create unexpected flavour pairings, or simply insights into how one asks what their personal experience of food is and how best to capture it in a dish of their own making. Instead, we have chapters fronted by titles like ‘vegetables are remarkable’ and ‘everything tastes better outdoors’. These ideas, so broad and so well suited to little tin signs for might buy in your local garden centre, simply don’t live up to the premise of the book. If Erickson backed up the chapters with ways to harness our ideas around these foods, there would very possibly be room for a very good cookbook here. Instead, it feels as though the authors (Sara Dickerman is credited as a co-writer) have a concept and a collection of recipes, but no way to connect the two coherently.
How often will I cook from the book? For all its faults in offering a meaningful path to creativity, there are plenty of delicious dishes waiting for those who are happy to let Erickson provide the innovation. Many of the recipes will be accessible for those looking for a quick weeknight dinner, from the ‘puffy casserole’ of the Sweet Corn Flan with Spinach, Beecher’s Cheddar, and Marjoram to the 1970s Mom’s Mayo-Slathered Salmon.
It’s also a simple book to work from – clear and crisp in design and instruction. Occasional tips at the bottom of recipes offer hints of the book’s premise, offering ideas on how to extend the concept of a dish beyond the recipe provided – though these are too few to make a real impact on how one cooks.
Killer recipes: Mushroom Duxelles on Olive Oil-Soaked, Garlic-Rubbed Toast, Grilled Lamb with Aleppo Pepper, Whipped Tahini, and Nectarines
Should I buy it? The case for buying Erickson’s book is actually pretty strong: there are plenty of interesting recipes in here that feel genuinely unique – the Roasted Castelfranco with Soft Scrambled Eggs, Parmigiano and Balsamic Vinegar is a gorgeous example, bringing unexpected life to radicchio. But the book does itself a disservice by trying to present itself as a more innovative title than it has the means to deliver. Take the subtitle, Making Food with Creativity and Curiosity with a pinch of salt, and understand that while there is plenty of sunlight in the recipes, the breadcrumbs are the few scattered moments of genuine insight.
Cuisine: American
Suitable for: Beginner and confident home cooks
Cookbook Review Rating: Three stars
Sunlight & Breadcrumbs by Renee Erickson & Sara Dickerman
£26.99, Abrams
Buy this book
Tenderheart – Hetty Lui McKinnon
Who is Hetty Lui McKinnon?
Hetty Lui McKinnon is a Chinese Australian cook, food writer and podcast host famed for her love of vegetables. She regularly contributes to The New York Times, Bon Appetit and Epicurious.com, and has also been featured in Food52 and The Guardian. She stays in touch with fans via her social media @hettymckinnon and enormously successful Substack newsletter To Vegetables with Love. Tenderheart is her fifth cookbook and follows To Asia, With Love (2021), the award-winning Family: New Vegetarian Comfort Food to Nourish Every Day (2019), Neighbourhood: Hearty Salads and Plant-Based Recipes from Home and Abroad (2017), and Community: Salad Recipes from Arthur Street Kitchen (2014).
What is Tenderheart’s USP?
Described by Nigella Lawson as ‘A love letter to vegetables… Almost a memoir through recipes, this truly special book speaks to the soul as much as to the stomach,’ Tenderheart is as much about the stories as it is about the recipes. So often, vegetable and plant-focused books can be overly preachy, yet Tenderheart focuses on nourishment, nurture and the unbreakable bonds formed through food. The 180 innovative recipes focus on 22 fruits and vegetables with unique flavour combinations and ideas designed to change how you approach not only fruit and vegetables, but the role food and cooking play in life and relationships.
What will I love?
Firstly, the writing. McKinnon writes beautifully with genuine emotion and passion. You can easily get lost in her stories about her father, childhood mealtimes or love for a particular ingredient.
The creativity is also particularly impressive. Recipes like the ‘Broccoli Forest Loaf’ and ‘Chocolate Aubergine Brownie’ sound unusual, but are utterly delicious. It is also a very reader-friendly book. Chapters are organised by the main vegetable so it is easy to find inspiration for a certain ingredient. Recipes contain detailed notes on how to make them vegan and/or gluten-free, if possible, alongside vegetable swaps so you can adjust according to your own taste and enjoy them year round.
Is it good bedtime reading?
Tenderheart is part cookbook, part food memoir. You can’t help but become immersed in McKinnon’s evocative stories as she shares the history behind each recipe. Each chapter features an introduction focusing on the particular vegetable and each recipe has a highly readable and engaging introduction so you could easily while away a few hours browsing through the book.
Will I have trouble finding the ingredients?
Yes and no. As long as you have a reasonably well stocked larder, and access to a larger supermarket you should be ok. Asian ingredients feature heavily, so you need to have the basics. There is the odd mention of things like Sichuan peppercorns, gochugaru and square wonton wrappers, but they aren’t too difficult to find in larger supermarkets or online. Plus, McKinnon is generous with her advice on substitutions so you can easily adapt recipes to suit what you already have at home.
Having said that, one of the chapters is dedicated to taro which is tricky to find in the UK. However, many of the recipes can be made with a different vegetable, as the recipes are designed to help you understand how flavours and textures work. Thus, you can experiment with different ingredients and make them your own.
How easy are the recipes to follow?
The recipes range in complexity. Some have instructions on how to make your own noodles (but you could easily use shop-bought) and ‘Broccoli Wontons with Umami Crisp’ involves making your own wontons, making it more of a ‘project’ recipe. In contrast, ‘Stir-fried Lettuce’ and ‘Soy Butter Bok Choy Pasta’ can be whipped up in minutes.
Stand-out recipes?
The ‘Carrot, Peanut Satay Ramen’ is a must-try. A wonderfully warming dish that is ideal for soothing the soul on cold and chilly evenings. Meanwhile, if you are a kale-sceptic, do try the ‘Cauliflower and Kale Pesto Pasta Salad with Burrata’, it might just change your mind. The ‘Crispy Potato Wedges with Lentils and Guasacaca Sauce’ (homemade wedges with a creamy avocado sauce) is another winner, full of fresh flavours.
On the sweet front, the previously mentioned ‘Chocolate Aubergine Brownie’ is a revelation – irresistibly nutty, fudgy and chocolatey all at once (and has the added bonus of being vegan-friendly without using any expensive egg replacers).
How often will I cook from this book?
This is a huge cookbook with plenty of recipes to choose from for almost every mood and occasion. ‘Pea, Egg-Drop Macaroni Soup’ is ideal when you want a nourishing meal using affordable ingredients you are likely to have at home, while the ‘Cheesy Kale and Rice Cake Bake’ is perfect comfort food (I highly recommend trying it with gnocchi if you can’t find rice cake sticks). Quick and easy meals are covered by the likes of ‘Cabbage and Kimchi Okonomiyaki’, while the ‘Cabbage and Kimchi Rolls’ take a bit more effort. There are also several baking recipes using vegetables if you are looking for new ways to satisfy your sweet tooth.
Any negatives?
The cover is an acquired taste and doesn’t really do justice to the recipes inside. If you aren’t keen on Asian flavours, you may feel that the majority of the recipes aren’t for you and die-hard meat fans might not be overly enthusiastic about the book either.
On first reading, some of the flavour combinations might feel a bit too ‘out there’ for more conservative cooks, but have faith, give a few a go and you might just be pleasantly surprised.
Should I buy the book?
Yes. Tenderheart is a beautifully written cookbook full of warmth, love and nurture. The kind of book that nourishes the soul as well as the stomach. McKinnon has gone the extra mile to ensure the recipes are innovative and exciting yet still accessible. Put simply, Tenderheart will revolutionise how you approach fruit and vegetables. It’s the ideal book for anyone looking to expand their plant-based food repertoire.
Cuisine: Plant-based (most with an Asian twist)
Suitable for: Open-minded cooks keen to explore new ideas
Great for fans of: Anna Jones and Nigel Slater
Cookbook review rating: Four stars
Buy this book: Tenderheart: A Book About Vegetables and Unbreakable Family Bonds
£35, Bluebird
This review was written by Freelance Food Writer and Recipe Developer Sophie Knox Richmond. Follow her on Instagram on @sophie_kr_food.


