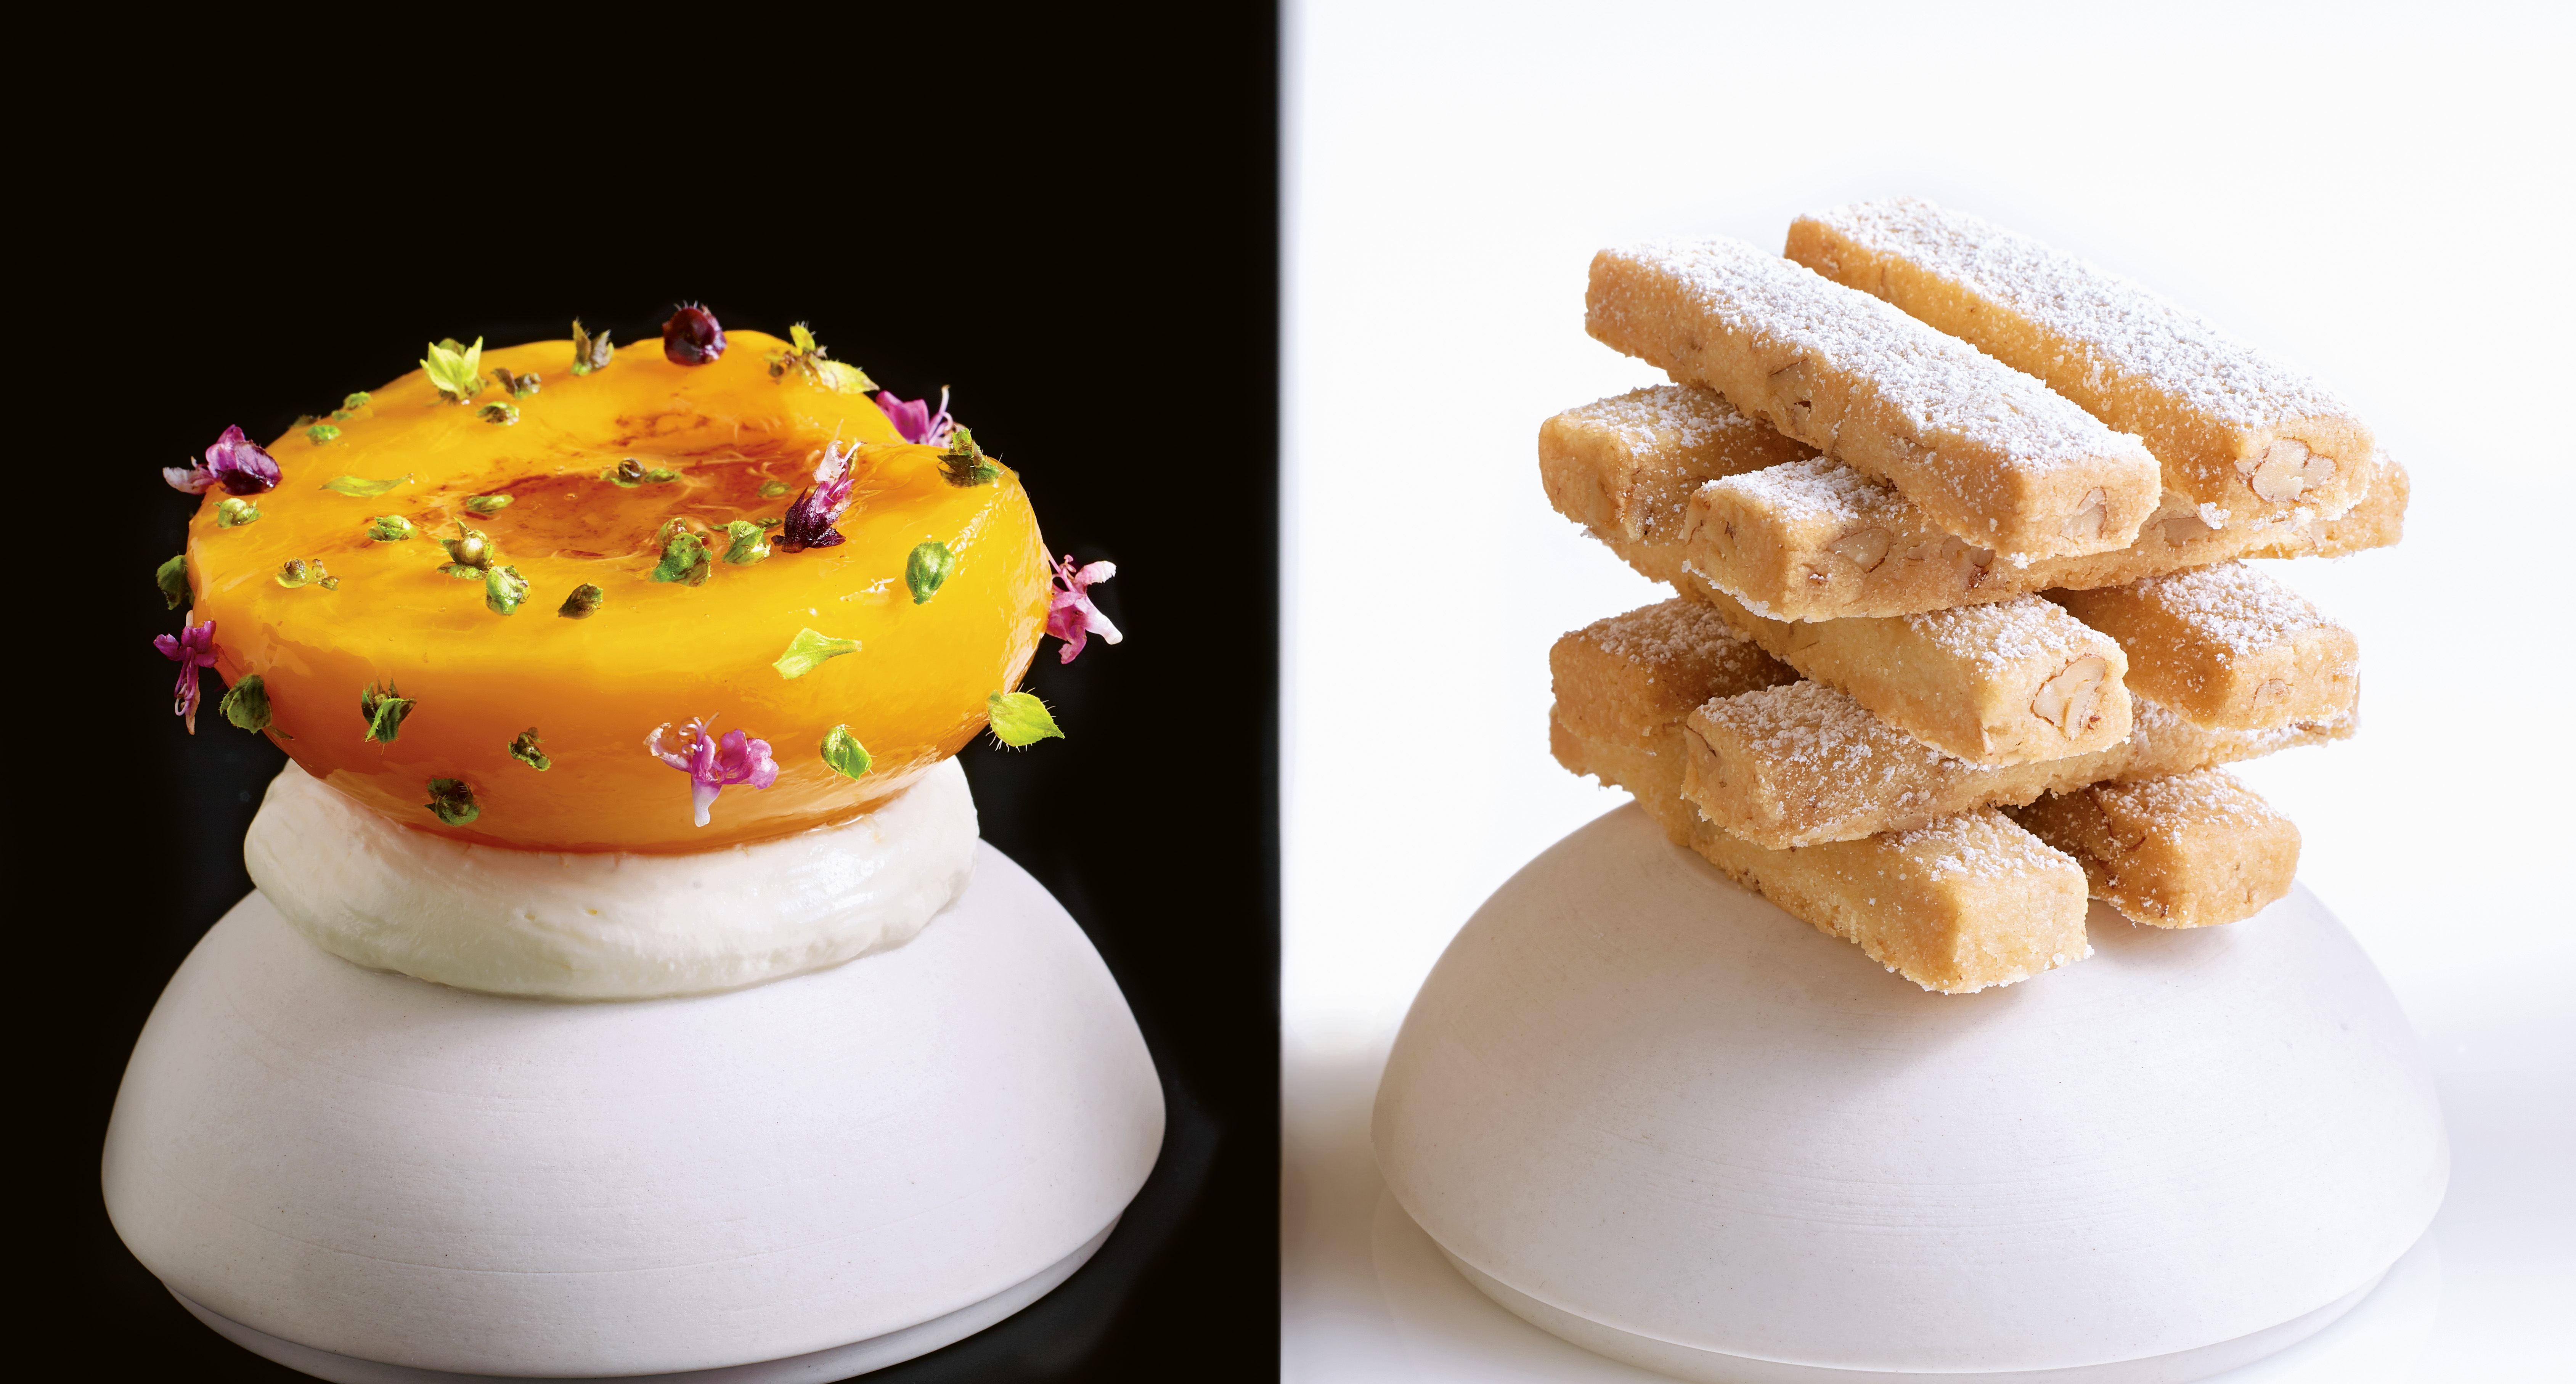
Peaches ‘N’ Cream by Thomas Keller

p.302 Peaches and Cream_THE FRENCH LAUNDRY, PER SE

Peaches ’n’ Cream
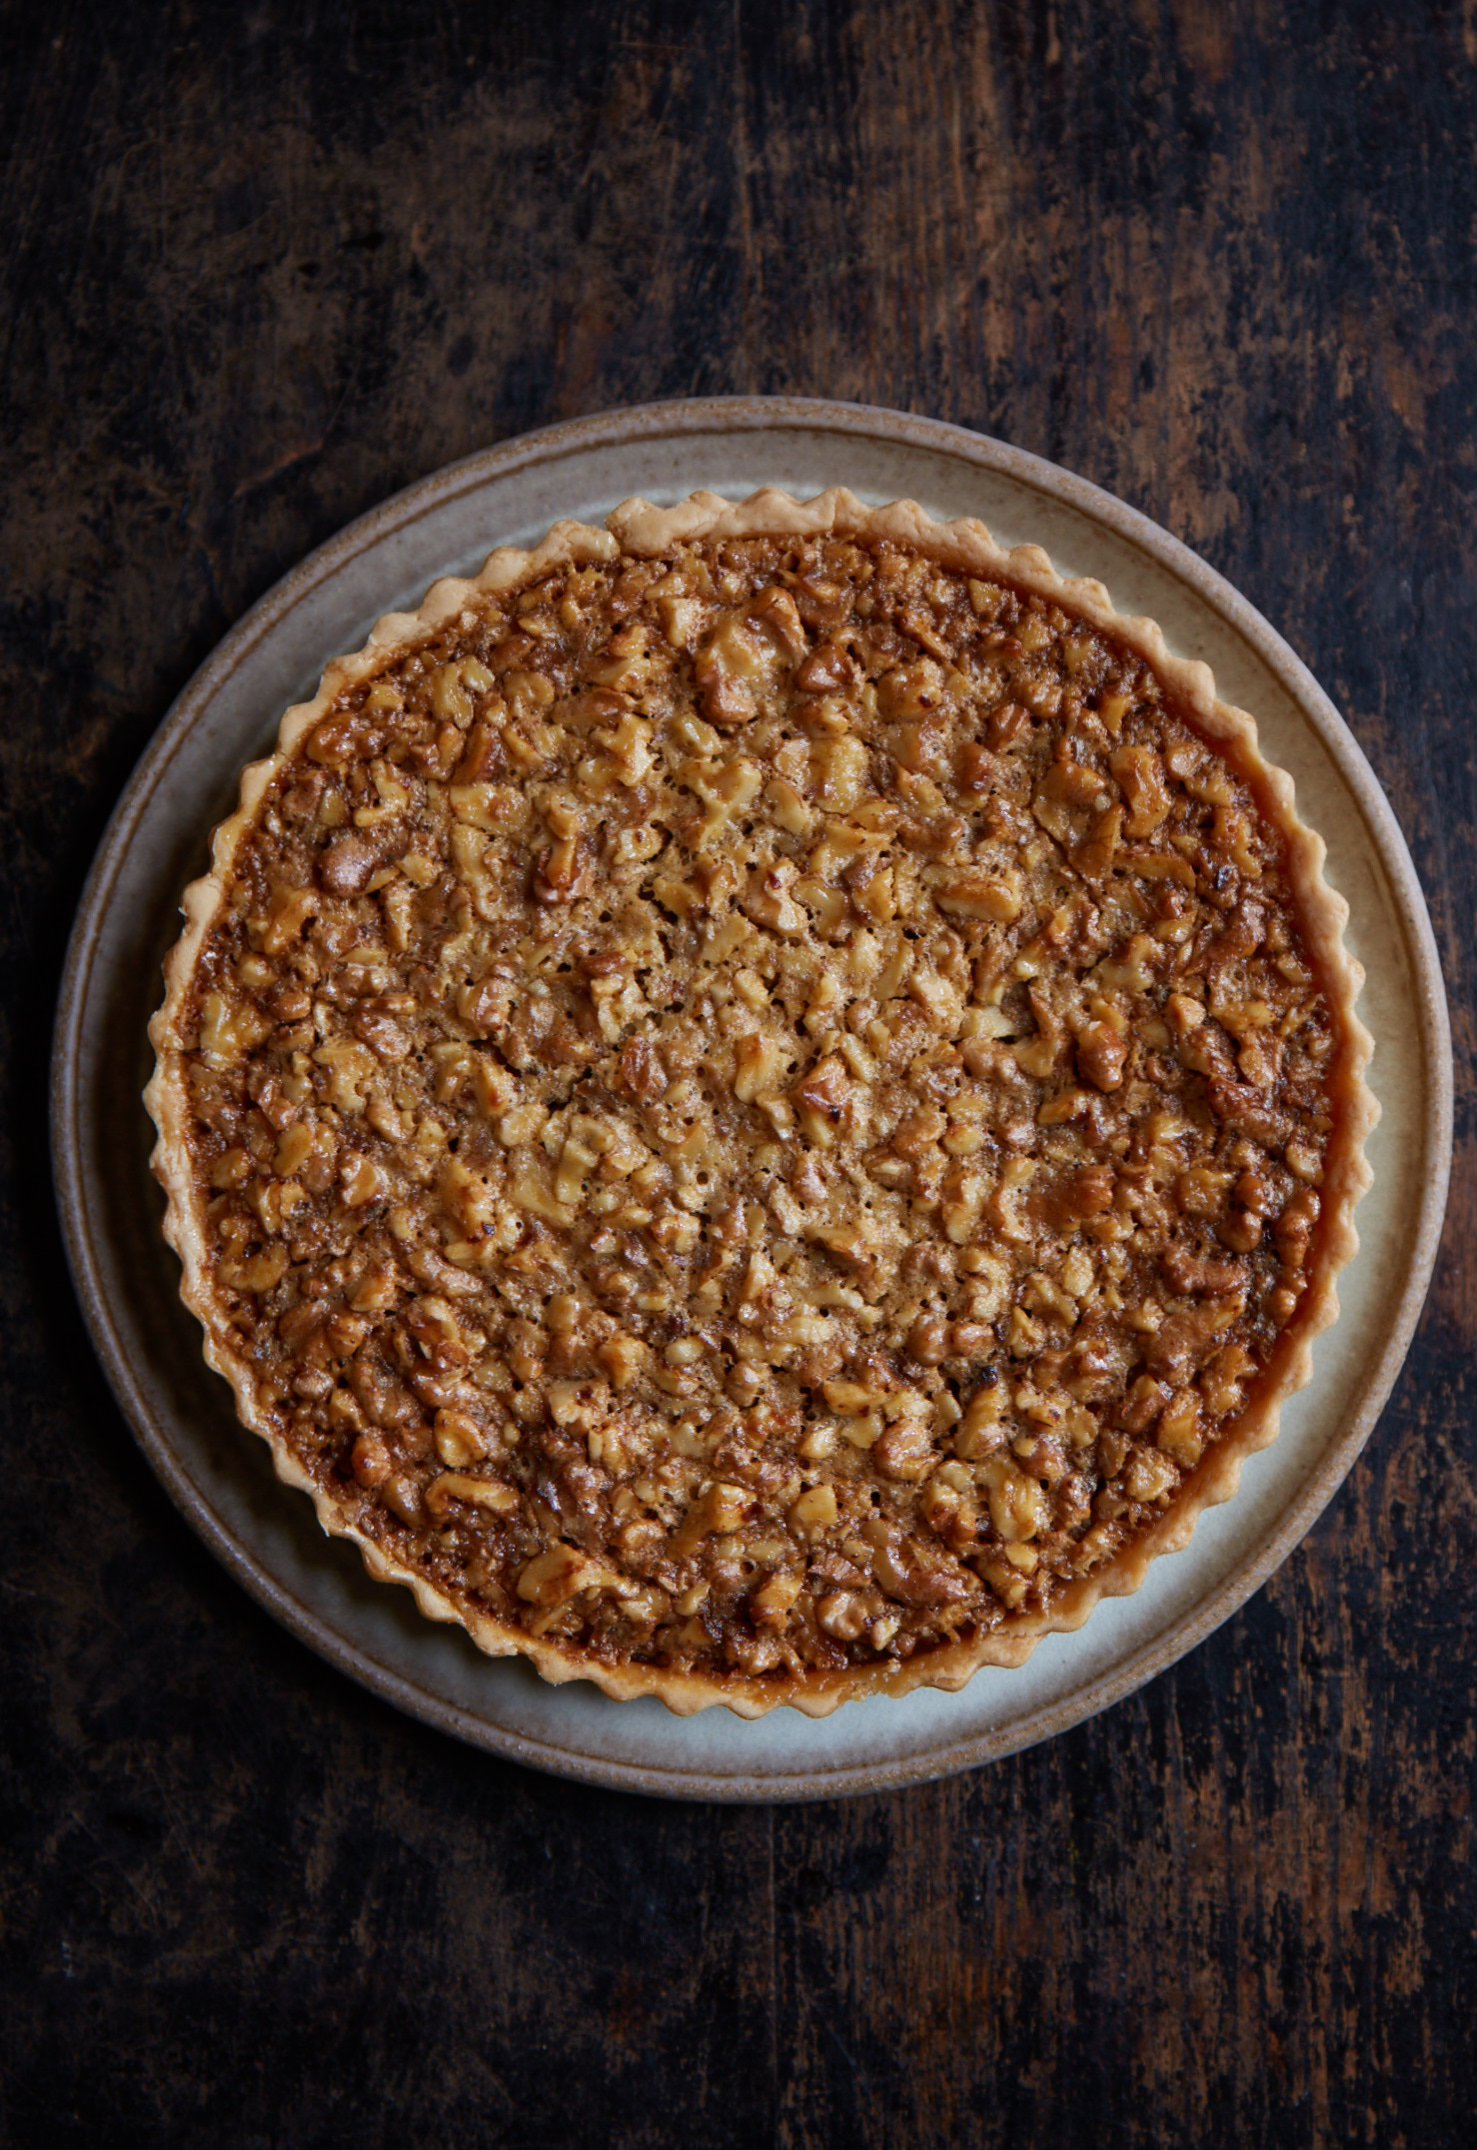
Whipped Ricotta and Pecan Sandies

Makes 10 servings

Canned Peaches
1,000 grams water
200 grams granulated sugar
20 grams ascorbic acid
5 freestone yellow peaches

Pecan Sandies
240 grams whole butter, at room temperature
63 grams confectioners’ sugar, plus extra for dusting
5 grams kosher salt
284 grams all-­purpose flour
100 grams raw pecans, chopped

Whipped Ricotta
15 grams granulated sugar
15 grams water
300 grams whole-­milk ricotta
Seeds from 1 vanilla bean
Zest of 1 lemon
200 grams mascarpone cheese
100 grams crème fraîche

Peach-­Scented Jelly
3 sheets silver leaf gelatin
50 grams lemon juice
To Complete
Fresh basil buds
Maldon salt

Special Equipment
Combi oven (optional)

The Napa Valley has some of the most amazing peaches you will ever taste, and at The French Laundry we are lucky enough to get the best of the bunch, all picked at perfect ripeness. But when they’re in the full flow of the summer season, they drop off the trees in such abundance that we can’t possibly serve them all. So we do what farms and households have been doing for hundreds of years: we put them up—preserve them. The process actually intensifies the flavor of the peaches and gives us the syrup they’re preserved in as a fabulous by-­product to include with their preparation. We usually can about 15 quarts of peaches in the summer; then we serve them around Christmastime, a special summer treat near the winter holidays. (Use perfectly ripe peaches with no bruises for canning. Firmer varieties work best; if they’re too soft, they can lose their shape.)

The syrup is seasoned with lemon and sugar, thickened with gelatin, and brought just to the setting point to create a thick, shiny glaze over the cold peaches. We finish the peach with basil buds from the garden (Genovese basil produces a white flower, Thai basil and lime basil produce a beautiful pink flower, and opal basil has a purple flower). We serve it with something creamy, here our housemade ricotta with mascarpone and crème fraîche, seasoned with vanilla and citrus. And for crunch, pecan sandies seem to be everyone’s favorite.

For the Canned Peaches
Stir together the water and sugar in a 2-­quart (2-­liter) saucepot (this is a 20% sugar solution). Heat just enough to dissolve the sugar without reducing the liquid and keep warm while you blanch the peaches.

Prepare an ice-­water bath and have it close to the cooktop. Bring a large pot of water to a rolling boil. Dissolve the ascorbic acid in 4,000 grams (4 quarts/4 liters) water in a 6-­quart (6-­liter) container and set aside.

Score the skin (not the flesh) of the bottom of the peach with a small 1-­inch (2.5-­centimeter) X. Drop 2 of the peaches into the boiling water and blanch for 30 to 40 seconds (see Note). Using a long-­handled slotted spoon, immediately transfer the peaches to the ice-­water bath to prevent further cooking. Using a paring knife, gently peel the peaches and set them on a tray. Repeat to blanch and peel the remaining peaches.

Cut the peaches vertically in half; separate the halves and remove the pits. Check the inside of the peaches to ensure they are good quality, with no mold or bugs. Drop the peaches into the ascorbic acid solution to prevent oxidation while you sterilize the jar.

If you have a combi oven, sterilize a clean 1-­quart (1-­liter) mason jar at 100°C (212°F) for 10 minutes. Otherwise, place a wire rack at the bottom of a large pot, fill the pot with enough water to submerge the jar, and bring the water to a boil. Place the jar on the rack in the pot, making sure it is submerged, and boil for 10 minutes. During the last minute, add a slotted spoon to sterilize it as well.

Meanwhile, bring the sugar solution to a gentle simmer. Remove the peaches from the ascorbic acid solution and place them in the sugar solution. Gently simmer for 3 minutes, then remove the pan from the heat. Using clean tongs, transfer the jar to a clean kitchen towel.

Keeping the jar free from any foreign contamination at this point is crucial; you want to keep a clean, sterile environment within the jar. Tilt the jar and, using the sanitized slotted spoon, gently scoop one peach half at a time from the sugar solution and lower it into the jar, rounded-­side down, until all the peach halves are in the jar. Return the sugar solution to a boil, then pour it into the jar, covering the peaches and leaving 1 inch (2.5 centimeters) of headspace at the top of the jar. Gently tap the jar on the counter to remove any air bubbles trapped by the peaches.

Place the lid on the jar and tighten it to fingertip-­tight (just until you feel resistance) to allow air to escape during the canning process. If you have a combi oven, process the jar at 100°C (212°F) for 20 minutes. Otherwise, check the pot you used to sterilize the jar; if there is not enough water to keep the jar submerged, add additional water. Bring the water to a boil. Stand the canning jar on the rack in the pot, making sure it is submerged, and boil for 20 minutes.

Remove the jar, tighten the lid all the way, and stand the jar upside down on the counter. Let cool to room temperature. Turn the jar right-­side up, clean the outside of the jar, check the lid for a proper seal, and label it with the date. Press the center of the lid; if it pops, the jar is not properly sealed. Remove the cap, reseal it, then steam or process in boiling water as before.

Properly sealed, the peaches will keep without refrigeration in an area not exposed to light for up to 6 months. The ideal temperature for long-­term storage is 40° to 70°F (4.5° to 21°C). After the jar has been opened, the peaches will keep in the refrigerator for up to 1 week. Always use a clean utensil, never your fingers, to remove peaches from the jar.

For the Pecan Sandies
Preheat the oven to 325°F (163°C). Line a sheet pan with a nonstick silicone baking mat.

In the bowl of a stand mixer fitted with the paddle, combine the butter, confectioners’ sugar, and salt. Beginning on low speed and gradually increasing to medium, cream the mixture until light and fluffy, about 3 minutes. Add the flour and pecans and mix on low speed until just combined, being careful not to crush the pecans. Transfer the dough to a work surface and press it with the heel of your hand as necessary to bring it together.

Place the pecan dough between two sheets of parchment paper and roll it out to ¼ inch (6 millimeters) thick, doing your best to keep a rectangular shape. From time to time, lift the top sheet of parchment and, using a dough cutter, push the edges to straighten them. (Keeping the dough a uniform rectangle will give a higher yield when cutting the cookies.) Slide the parchment onto a sheet pan and refrigerate for at least 1 hour and up to 24 hours, or wrap in plastic wrap and freeze for up to 3 months. (If frozen, defrost before baking.)

Cut the cookie dough into 2 by ½-­inch (5 by 1.25-­centimeter) batons. Using a small offset spatula, transfer them to the lined sheet pan, leaving 1 inch (2.5 centimeters) between them. Bake for 10 to 13 minutes, until golden.

Meanwhile, put some confectioners’ sugar in a small fine-­mesh sieve. Remove the cookies from the oven and, while they are still hot, immediately dust the tops with confectioners’ sugar. Let cool.

The cookies can be stored in an airtight container for up to 3 days.

For the Whipped Ricotta
Heat the sugar and water in a small saucepot just enough to dissolve the sugar. Remove from the heat and let the simple syrup cool completely.

In the bowl of the stand mixer fitted with the whisk, whisk together the ricotta, vanilla seeds, and lemon zest until well combined. Add the mascarpone and whisk until smooth. Add the crème fraîche and whisk until smooth. Finally, whisk in the simple syrup. Refrigerate in an airtight container for up to 5 days.

For the Peach-­Scented Jelly
Submerge the gelatin in a bowl of ice water to bloom (soften) for about 5 minutes.

Set a cooling rack over a half sheet pan. Open the jar of peaches and pour 250 grams of the syrup into a small saucepot. Arrange the peach halves cut-­side up on the rack and refrigerate while you make the jelly.

Add the lemon juice to the syrup in the saucepot and bring to a simmer. Remove from the heat. Remove the softened gelatin from the ice water and squeeze out any excess water. Add the gelatin to the hot syrup and whisk to dissolve. Strain the syrup through a chinois or fine-­mesh strainer into a bowl and nestle the bowl in an ice-­water bath to cool, stirring from time to time. Watch closely; as the syrup cools, it will begin to set, and you need to catch it right at the setting point, when it has thickened and begun to gel but still has fluidity. When the syrup reaches this point, remove the peaches from the fridge and spoon the syrup over them in a thick layer. Refrigerate to set the jelly completely, at least 4 hours and up to 24 hours.

To Complete
Remove the peaches from the refrigerator. Crush the basil buds lightly between your fingers to release their scent and flavor and sprinkle them over the peaches. Finish each peach with a little Maldon salt.

Place a large spoonful of the whipped ricotta in each serving bowl or on serving plates. Gently rest a peach half on top, cut-­side up. Serve with a stack of pecan sandies on a plate alongside.

Note
Blanching peaches loosens their skins, making them easier to peel. The heat helps to separate the skin from the peach so the peels slip off.

Excerpted from The French Laundry, Per Se by Thomas Keller (Artisan Books). Copyright © 2020. Photography by Deborah Jones.

Cook more from this book
Fish and Chips
The Whole Bird

Read the review
Coming soon

Buy this book
French Laundry, Per Se, The (Thomas Keller Library)
£60, Artisan

Faviken: 4015 Days, Beginning to End by Magnus Nilsson

Faviken 4015 Days

‘Why would anyone write a book about a closed restaurant? And who would want to read it?’ That’s the question chef and author Magnus Nilsson poses in his fifth book, and the second about his restaurant Fäviken, which closed in December 2019. For those of us who made the journey to the remote hotel and dining room in rural Jämtland in Sweden, the book acts as a thrilling reminder of Nilsson’s distinctive culinary style. Who else would serve diced raw ox heart with marrow from a bone that was theatrically sawn in half in the middle of the dining room?

For those who didn’t make it, Nilsson delivers much more than a mere ‘here’s what you could have won’ experience (although an eight page complete list of dishes served at the restaurant in chronological order is included). By contrasting text from the first Fäviken book published in 2012 with new writings, Nilsson offers an insight into the evolution of his cooking over the restaurant’s decade-long lifetime.

One of Nilsson’s most famous creations, almost burnt cream (served as an accompaniment to roasted king crab leg), developed from a combination of accidentally burning cultured milk for a sorbet, which he realised as he poured it away ‘actually smelled pretty good’, and tasting the residue of a cream sauce from a cooling pan. The result, Nilsson says, ‘was perfect, deep and toffee-like from the caramelised proteins and lactose’.

Nilsson further explores the notion of creativity in one of the book’s 17 short essays, using English social psychologist George Wallas’s five-stage model that divides the creative process into preparation, incubation, intimation, illumination and verification to explain how his dishes go from theoretical idea to  the plate.

Erik Olsson’s photographs that span the life of the restaurant provide a visually stunning counterpoint to  Nilsson’s recipes, stories, anecdotes and musings. Who would want to read a book about a closed restaurant? When it’s somewhere as remarkable as Fäviken, and written by someone as talented as Nilsson, who wouldn’t?

This review first appeared in The Caterer magazine.

Cuisine: Nordic 
Suitable for: Professional chefs
Cookbook Review Rating: Five stars 

Buy this book
Fäviken: 4015 Days, Beginning to End (FOOD COOK)
£45, Phaidon 

Vanilla crème brûlée by Tom Kerridge

creme brulee6363

Vanilla crème brûlée is one of those classic desserts that everyone knows about and loves. And it’s been on the menu at The Hand & Flowers right from the very start. As far as I’m concerned, the key to a properly perfect brûlée is to have three distinct flavours that you taste – vanilla, eggs and caramel – so that it’s not just a sweet, creamy dessert. And I’ve got Alex Bentley to thank for teaching me that. This is 100% the brûlée recipe I was cooking as a young chef at Monsieur Max, where he was head chef. I think Alex was given or inherited the recipe from Max Renzland, the restaurant’s chef-patron. Apparently, it was an old Elizabeth David recipe; she must have learnt it during her travels in France, so goodness knows how old it really is.

Until Alex taught this recipe to me, most crème brûlée recipes I’d come across were sweet and made only with egg yolks. This one uses whole eggs and just a small amount of sugar. It was a game changer for me. I suddenly knew how to make a magical crème brûlée. The technique that really brings the dessert to life is its caramelisation on top. Instead of just melting the sugar, Alex taught me to caramelise it really heavily. At Monsieur Max, customers sometimes complained that the sugar was burnt, but that’s the whole point. It’s supposed to be; the caramelisation makes it taste toasty and nutty. You end up with a smooth, vanilla dessert that’s creamy with a bittersweet crunchy topping.

We match it at The Hand & Flowers with an Innis & Gunn craft beer rather than a dessert wine. The beer’s aged in old whiskey barrels so it has this really rich toffee, creamy flavour, which harmonises beautifully with the
crème brûlée.

serves 6

750ml double cream
1 vanilla pod
4 medium free-range eggs
30g caster sugar

Put the cream and vanilla pod into a heavy-based saucepan and bring to the boil over a medium heat. Remove from the heat and leave to infuse for 30 minutes.
Beat the eggs and sugar together in a bowl until smoothly blended. Bring the vanilla-infused cream back to the boil, then slowly pour onto the beaten egg mixture, whisking as you do so to combine.

Pour the mixture back into the pan and cook, stirring constantly, over a medium-low heat until the custard thickens and reaches 88°C (check the temperature with a digital probe). Immediately remove from the heat and pass through a fine chinois into a clean bowl.

Press a layer of cling film onto the surface to prevent a skin forming and leave to cool for 20 minutes or until the custard is at room temperature. Pour the custard into a high-powered jug blender (Vitamix) and blitz for 30 seconds; this will lighten it slightly.

Now pour the custard into crème brûlée dishes or ramekins, dividing it equally (about 125ml per dish). Cover each dish with cling film, leaving a small gap on one side, to allow any moisture to evaporate. Stand the dishes on a tray and place in the fridge to set; this will take about 3 hours.

Caramel glaze
200g demerara sugar

When ready to serve, sprinkle a generous, even layer of demerara sugar over the surface of each set custard. Wipe the edge of the dish with a clean cloth.
Using a cook’s blowtorch, caramelise the sugar, starting from the edges and working towards the centre. Take the caramel to a dark brown – this dish is all about  balancing the rich creamy egg custard with the slightly bitter caramel flavour.
Leave to cool for about 5 minutes before serving.

Cook more from this book
Smoked haddock omelette
Slow cooked duck

Buy this book
The Hand & Flowers Cookbook
£40, Bloomsbury Absolute

Read the review
Coming soon

Slow cooked duck by Tom Kerridge

duck6033

We already had a great little business, but Great British Menu became one of the most pivotal moments in the pub’s history. The programme is very special: it shines the spotlight on quality British produce and showcases food and restaurants around the UK, which is brilliant because that underlines that our world isn’t just about London and the Southeast.

To get to the final, you compete in ‘heats’, and in 2010, my cook-off location was Waddesdon Manor, which is near Aylesbury. So, to me, the obvious thing to cook was something with Aylesbury duck. These ducks taste amazing and they’re from a small-scale producer – everything Great British Menu is about. Since an important part of our Hand & Flowers menu includes chips on the side (we’re a pub, after all), I decided to make the ultimate chips, cooked in duck fat.

I needed peas, too. So, I went down the route of petits pois à la française, except, instead of using bacon, which you’d normally do, I used crisp-fried duck leg confit. And then I finished the dish with a gravy that uses honey from the Waddesdon estate.

It all added up to a winner. I remember one Saturday night after the banquet was televised, we did 84 covers and served 78 portions of duck in one sitting. The success of this dish has been extraordinary.

serves 4

To prepare the duck
2 large Aylesbury ducks, about 2kg each
3 tsp ground mace

Remove the legs and wings from the ducks and take out the wishbone (reserve for the faggots, gravy etc., see right and overleaf). Remove the excess fat and skin, placing it all in a frying pan. Now carefully cut away the backbone; you should be left with the crown.

Place the pan of fat and skin over a low heat to render the fat out. Set aside for later use. Score the skin on the duck crowns and rub in the mace. Heat a heavy-based frying pan over a medium high heat. Add the duck crowns and sear on all sides for 5–10 minutes to render the fat and give the skin a good golden colour. Remove the
duck crowns from the pan and allow to cool.

Put each duck crown into a large vacuum-pack bag and vacuum-seal on full pressure. Immerse in a water-bath at 62°C and cook for 1½ hours. Lift out the vacuum-pack bags and remove the ducks. Carefully cut the breasts from the crowns. Cover and refrigerate until ready to cook.

Duck gravy
500g duck bones and wings, chopped
A little vegetable oil for cooking
4 carrots, peeled and chopped into 3cm pieces
4 celery sticks, cut into 3cm pieces
1 onion, peeled and diced into 3cm pieces
1 garlic bulb, cut across in half, through the equator
150g runny honey
4 cloves
2 litres chicken stock (see page 400)
50ml soy sauce
About 500g unsalted butter
Lemon juice, to taste (optional)
Sea salt and freshly ground pepper

Preheat the oven to 205°C/Fan185°C/Gas 6–7. Put the chopped duck bones and wings into a roasting tray and roast in the oven for about 25–30 minutes until golden brown and caramelised.

Heat a little oil in a large heavy-based saucepan over a medium-high heat. Add the chopped carrots and colour until darkly caramelised. Add the celery, onion and garlic and similarly colour until well browned.

Remove the duck bones and wings from the roasting tray and add them to the saucepan. Drain off the excess fat from the roasting tray, then add the honey and cloves to the tray. Place over a medium heat and take the honey to a dark golden caramel. Add a splash of the chicken stock and the soy sauce to deglaze the tray, stirring to scrape up the sediment.

Add the liquor to the duck bones and vegetables. Pour in the rest of the chicken stock and reduce down by half, to 1 litre. Pass the liquor through a muslin lined sieve into a clean pan and skim off any excess fat from the surface. Add 250g butter to every 500ml duck liquor and reduce down until it has emulsified into the sauce. Season with salt and pepper and add a little lemon juice if required. Set aside for serving.

Duck faggots
250g minced duck leg (skin on)
50g minced chicken liver
50g breadcrumbs
1 medium free-range egg
5g salt
2g cracked black pepper
100g caul fat, soaked in cold water for 30 minutes

Put all the faggot ingredients into a bowl and mix well until evenly combined. Divide and shape the mixture into 50g balls. Wrap each one in caul fat to enclose. Steam the duck faggots at 100°C for 20 minutes. Remove from the steamer and allow to cool, then chill until needed. When ready to serve, preheat the oven to 205°C/Fan 185°C/Gas 6–7.  Place the faggots on a baking tray and bake for 8 minutes. Hold the faggots in the duck gravy until ready to plate up.

Duck legs & peas
2 duck legs
1 star anise
½ cinnamon stick
10 black peppercorns
1 tsp coriander seeds
1 tsp fennel seeds
1 tbsp rock salt
2 bay leaves
About 300ml duck fat
500g freshly podded peas
4 tbsp runny honey
A little vegetable oil for cooking
2 large banana shallots, peeled and finely diced
100ml chicken stock
2 Gem lettuces, finely sliced
20 small mint leaves

Preheat the oven to 150°C/Fan 130°C/ Gas 2. Put the duck legs into a large ovenproof pan or flameproof casserole. Tie the spices together in a muslin bag and add them to the pan with the rock salt and bay leaves. Pour on enough duck fat to cover and bring to the boil over a medium heat. Transfer the pan to the oven and cook for 3½ hours or until the duck legs are soft. Leave them to cool in the duck fat. Once cooled, remove from the fat and place in the fridge. Meanwhile, add the peas to a pan of boiling salted water, bring back to the boil and blanch for no longer than 1 minute. Immediately drain and refresh in iced water. Drain and set aside.

Preheat the oven to 205°C/Fan 185°C/Gas 6–7. Place an ovenproof heavy-based frying pan over a medium-high heat. Add the duck legs, skin side down, and place in the oven for 10–12 minutes to crisp up. Remove the duck legs to a plate and add the honey to the pan. Allow to caramelise, then pour over the duck legs and allow to cool. When ready to serve, heat a little oil in a saucepan over a medium heat. Add the shallots and sweat for 10–15 minutes until softened. Add the peas and stock and bring to a simmer. Meanwhile, flake the duck leg. Stir the duck meat into the peas with the lettuce and mint. Divide between 4 small serving pots.

Duck fat chips
15 large potatoes for chipping
2.5 litres duck fat for deep-frying

Cut a slice from the top and bottom of each potato, then press an apple corer through from top to bottom to make round cylinder chips. Put the cut chips into a colander under cold running water to wash off some of the starches. Now add the chips to a pan of boiling salted water, bring back to a simmer and poach for about 10 minutes until just soft, but still holding their shape. Drain on a perforated tray and leave
to cool.

Heat the duck fat in a deep-fryer to 140°C. Lower the chips into the hot fat in a wire basket and deep-fry for 8–10 minutes until the oil stops bubbling. Remove the chips from the fryer, drain and leave to cool. Set aside until needed. When ready to serve, heat the duck fat to 180°C and deep-fry the chips for about 6–7 minutes until golden
and crispy. Remove, drain on kitchen paper and season with salt.

To serve
2 tbsp runny honey
50g unsalted butter
Pea shoots, to garnish

Just before serving, preheat the oven to 200°C/Fan 180°C/Gas 6. Heat a little oil in a heavy-based ovenproof frying pan over a medium-high heat. Add the duck breasts, skin side down, and fry for 3–4 minutes to crisp up the skin, then place in the oven for 4–5 minutes to heat through. Pour off any excess fat from the pan, then add the honey and butter and turn the duck around in the pan to coat in the honey glaze.
Remove the duck breasts to a warmed plate and rest in a warm place. Increase the heat under the pan to caramelise the honey glaze then pour it over the duck breasts.
Serve the duck breasts with the duck legs and peas, duck faggots, gravy and chips. Finish with a garnish of pea shoots.

Cook more from this book
Smoked haddock omelette
Vanilla crème brûlée

Buy this book
The Hand & Flowers Cookbook
£40, Bloomsbury Absolute

Read the review
Coming soon

Smoked haddock omelette by Tom Kerridge

Smoked-haddock_621

A delicate, beautiful omelette is one of those pure dishes that makes you realise great food does not have to be about hundreds of ingredients on a plate. It’s about allowing a simple product to sing. I learnt that lesson back in the day when I worked for Gary Rhodes and we used to do a lobster omelette which showcased the chef ’s technique rather than putting a load of fancy things on the plate.

This smoked haddock omelette, which has been on The Hand & Flowers menu pretty much since we opened, started off as a lobster one. But I took a sharp, commercial learning curve early on. Starting out, of course, we had no accolades and were relatively unknown, so there was no reason for customers to spend what, at the time, was the equivalent of £30 or £35 on an omelette, even if it had lobster in it!

I still loved the idea of an omelette, so we tried an omelette Arnold Bennett (a fluffy open omelette created at The Savoy in the 1920s for the novelist, playwright and critic). Most people didn’t know who Arnold Bennett was, so we just called it ‘smoked haddock omelette with Parmesan’ and after a first couple of bumpy weeks it became one of our most popular dishes.

There is no reason why this dish should ever change. I can’t improve it. The flavour profile of the humble omelette is heightened with gently poached smoked haddock, a brilliant glaze made from hollandaise sauce and a béchamel sauce flavoured with the fish poaching liquor. So, even the glaze has got that lovely smoked taste, which really drives the flavour.

Actually, this omelette is probably my favourite dish on the menu. I am very pleased to say the lobster version has reappeared at Kerridge’s Bar & Grill in London some 14 or 15 years down the line, and has gone on to become one of our most Instagrammed dishes. Thank you Gary Rhodes…

serves 4

Poached smoked haddock
1 side of smoked haddock, 600g,
skin and pin bones removed
600ml whole milk

Check the smoked haddock for any tiny pin bones. Bring the milk to the boil in a wide-based saucepan. Carefully lay the smoked haddock in the pan, ensuring it is covered by the milk. Place a lid on the pan, turn off the heat and leave the fish to poach in the residual heat for about 10 minutes. Once the haddock is cooked, remove it from the milk and gently flake the fish into a tray lined with greaseproof paper. Cover the tray with cling film and place in the fridge until ready to serve.
Pass the milk through a fine chinois into a clean saucepan and keep to one side.

Smoked fish béchamel
250ml smoked haddock poaching
liquor (see left)
15g unsalted butter
15g plain flour
Sea salt and freshly ground pepper

Bring the smoked haddock poaching liquor to a gentle simmer. In a separate pan over a medium-low heat, melt the butter. Stir in the flour to make a roux and cook, stirring, for 2 minutes. Gradually ladle in the warm poaching liquor, stirring as you do so to keep the sauce smooth. Cook gently over a very low heat for 20 minutes. Pass the sauce through a fine chinois and cover the surface with a piece of baking parchment or cling film to prevent a skin forming. Set aside until needed. (You won’t need all of the fish béchamel but you can freeze the rest.)

Omelette glaze
4 tbsp warm smoked haddock
béchamel (see left)
4 tbsp hollandaise sauce
(see page 403)
4 medium free-range egg yolks
Sea salt and freshly ground pepper

Gently warm the béchamel in a saucepan then pour into a bowl and whisk in the hollandaise and egg yolks. Season with salt and pepper to taste and pass through a chinois into a warm jug or bowl. Keep warm to stop the glaze from splitting.

To assemble & cook the omelette
12 medium free-range eggs
4 tbsp unsalted butter
100g aged Parmesan, finely grated
Sea salt and freshly ground pepper

Crack the eggs into a jug blender and blend briefly to combine. Pass through a chinois into a measuring jug. Place 4 individual omelette pans (we use Staub) over a low heat. Take the smoked haddock from the fridge, remove the cling film and lay on a grill tray. Warm under the salamander or grill. To each omelette pan, add 1 tbsp butter and heat until melted and foaming. Pour the blended egg into the pans, dividing it equally. Using a spatula, gently move the egg around in the pans until they start to firm up. Remove from the heat; you want the eggs to be slightly loose, as they will continue to cook off the heat.

Season the omelettes with salt and pepper and sprinkle the grated Parmesan over their surfaces. Divide the flaked smoked haddock between the omelettes, then spoon on the glaze to cover the fish and extend to the edge of the pans. If the glaze spills over the side of the pan, wipe it away, as this will burn on the side when  blowtorching. To finish, wave a cook’s blowtorch over the surface of the omelettes to caramelise the glaze. Allow the glaze to become quite dark, as the bitterness will balance out the richness of all the other ingredients.

Cook more from this book
Slow cooked duck
Vanilla crème brûlée

Buy this book
The Hand & Flowers Cookbook
£40, Bloomsbury Absolute

Read the review
Coming soon

Smoked Cod Cakes by Maura O’Connell Foley

Maura_CodCakes_057

These cod cakes can be made in advance and frozen for up to one month, making them ideal to be served at any time of day, be that breakfast, lunch or a light supper with Tartare sauce and a green salad. The cakes can also be deep-fried for a crispier result in a canape or starter size. To do so, shape the mixture into small balls (golf ball size) and deep fry in hot oil until golden brown.

Ingredients

  •  Makes around 15-20 small cakes
  • 450g undyed smoked cod
  • 285ml cold milk, for poaching
  • 285ml water, for poaching
  • 45g butter
  • 45g plain white flour
  • 285ml whole milk
  • Sea salt and cracked
  • black pepper
  • 2 eggs, lightly beaten
  • 55g freshly grated Parmigiano Reggiano or
  • mature Coolea gouda cheese
  • 115g fresh soft white breadcrumbs
  • Oil and clarified butter to shallow fry, or oil for deep fat frying

Method

Place the cod in a medium saucepan and cover with the milk and water. Bring to a boil over a medium heat, then reduce to a low heat to gently poach for 5 minutes or until the cod flakes easily. Remove the cod from the poaching liquid and flake into chunky pieces, removing any bones, sinew or skin.

In a small saucepan, melt the butter over a low heat. Add the flour and cook for a further 2 minutes, continuing to stir with a whisk. Turn up to a medium heat and gradually pour in the milk, continuing to stir and cook for at least 6 minutes until the sauce is a very thick consistency (like choux pastry). Season to taste. Turn down to a low heat and add the eggs slowly, stirring vigorously to blend and ensure a smooth consistency. Stir in the cheese. Remove from the heat.

Gently mix in the fish, being careful to keep the fish in generous chunks. With the breadcrumbs in a bowl nearby, take heaped tablespoons of the cod mixture and gently coat in the breadcrumbs, not pressing or handling too much. If shallow frying, make small little cakes. If deep fat frying, shape into small round balls (golf ball size).

Place on a tray and chill for 30 minutes in the fridge before frying, not covering to avoid soggy breadcrumbs.

Heat enough clarified butter and oil in a wide frying pan to cover the base, then shallow fry for 3 minutes either side until golden brown. Repeat in batches until all the cakes are cooked. Alternatively, deep fry in batches until golden brown.

Tartare Sauce
Tartare sauce is a classic sauce for deep fried fish or any fried fish in general. The key to this sauce is its piquancy. I serve it with crab cakes and smoked cod cakes. Capers grow wild in a bush in the Mediterranean and should be much more expensive given that they must be handpicked, only when ripe and at a specific time of day. They are also cultivated, but even then, they cannot be picked by machine. If using salted capers, ensure you rinse off the salt. Large capers can be chopped; if using small capers, do not chop.

Ingredients
Makes 250ml

  • 2 egg yolks, room temperature
  • 15g English mustard
  • 215ml sunflower oil
  • 1 ½ tbsp white wine vinegar
  • 2 tbsp chopped chives
  • 2 tbsp chopped parsley leaves, flat leaf or curly
  • 3 tbsp capers, rinsed and chopped if large or whole if small
  • Sea salt and cracked
  • black pepper

Method

Beginning with the base of a mayonnaise, place the egg yolks and mustard in a food processor and start the machine running. Very slowly, trickle in the oil through the funnel, being careful to avoid splitting the mayonnaise. Once the mixture starts to thicken, the oil can be added more confidently and quickly. Add the vinegar, adding more mustard if desired. Tip into a bowl and finish by mixing through the chives, parsley and capers. Season to taste.

Cook more from this book
Twice Baked Cheese Soufflé by Maura O’Connell Foley
Rum and Walnut Tart with Rum Butterscotch Sauce by Maura O’Connell Foley

Buy this book
€35 Order from mywildatlantickitchen.com 

(The book is also available from Amazon
My Wild Atlantic Kitchen: Recipes and Recollections
£35, Maura O’Connell Foley)

Read the review 
Coming soon


Twice Baked Cheese Soufflé by Maura O’Connell Foley

Maura_Souffle_018

This recipe includes a soft and hard goat’s cheese. Instead of goat’s cheese, for the hard cheese a mature cheddar, pecorino or Parmigiano-Reggiano can be used and for the soft cheese a soft blue cheese would work well. These can be prepared several hours in advance with a first initial bake and then a second bake just before serving. Lovely served with a small organic green salad and a hazelnut dressing.

Ingredients
Makes 4
Ramekin Lining:
• 30g hazelnuts (about 20 hazelnuts)
• 60g soft white breadcrumbs
• 30g softened butter

Soufflé:
• 15g butter
• 15g plain white flour
• 100ml milk
• 60g hard goat’s cheese, grated
• 2 egg yolks, beaten
• 6 egg whites
• 60g soft goat’s cheese for centre filling, chopped
• ½ tsp lemon juice
• Sea salt

Hazelnut Dressing:
• 1. tbsp apple cider vinegar
• 3 tbsp olive oil
• 1 tbsp hazelnut oil
• 1 tsp local honey (warmed to help it combine), plus extra to taste
• Sea salt and cracked black pepper

Method

To toast and skin the nuts, preheat the oven to fan 160°C / fan 325°F / gas mark 4. Arrange the nuts in a single layer on a baking tray and toast in the oven for about 10-15 minutes, turning occasionally until the skins crack and the nuts are light golden. Once roasted, rub the nuts in a dry cloth to remove the skins. Pulse in a processor for a few seconds to bring the nuts to a coarse crumb consistency. Combine the hazelnut crumbs and breadcrumbs.

To prepare the ramekins, generously brush the butter over the sides and bottoms of the ramekins. Coat with a generous layer of hazelnut breadcrumbs. Set aside.

Increase the oven temperature to fan 170°C / fan 340°F / gas mark 5.

Make the base of the soufflé by melting the butter in a saucepan over a low heat. Add the flour and cook, stirring, to a pale golden colour. Gradually add the milk,  continuing to stir, to a smooth consistency. Bring to the boil, then take off the heat and allow to cool. Stir in the hard goat’s cheese, egg yolks and season with sea salt.

In a large dry bowl (essential for whipping egg whites), beat the egg whites with the sea salt until slightly thickened. Add the lemon juice and whisk to stiff peaks. Take a quarter of the egg white mixture and mix this into the cooled soufflé base until well combined. Gently fold in the remaining egg white mixture until well combined.

Half fill the ramekins with the soufflé mixture, place the soft goat’s cheese in the centre then cover with the remaining soufflé mixture, filling the ramekin to the top.

Run your thumb around the ramekins to clean the top edge – this helps the soufflé to rise. Place each of the ramekins in a roasting tin and pour in enough hot water to a depth of two thirds around the ramekins.

Bake for 15 minutes for the first bake. Remove from the oven and allow to cool for at least 15 minutes. At this point, the soufflés can be set aside if preparing in advance and chilled in the fridge for up to 6 hours only.

For the second bake, heat the oven to fan 200°C / fan 400°F / gas mark 7. Loosen the soufflés in the ramekin with a palette knife or small knife. Return the soufflés to the oven, this time with no water in the roasting tray, and bake for 10 minutes or until lightly risen.

To make the dressing, put all the ingredients into a jar, tightly seal and shake vigorously. Add local honey and seasoning to taste, then shake again. Taste and adjust to your liking.

Serve the soufflés immediately with a green salad and hazelnut dressing.

Cook more from this book
Rum and Walnut Tart with Rum Butterscotch Sauce by Maura O’Connell Foley
Smoked Cod Cakes

Buy the book
€35 Order from mywildatlantickitchen.com 

(The book is also available from Amazon
My Wild Atlantic Kitchen: Recipes and Recollections
£35, Maura O’Connell Foley)

Read the review
Coming soon

Rum & Walnut Tart with Rum Butterscotch Sauce by Maura O’Connell Foley

Maura_ Walnut_Rum_Tart_027
Ingredients
Serves 8

Pâté Sucrée:
• 125g plain white flour
• 55g butter, softened
• 55g icing sugar
• Pinch of sea salt
• 1 egg

Rum Butterscotch Sauce:
• 30g butter
• 70g light brown sugar
• 70g golden syrup
• 90ml cream
• 45ml dark Jamaican rum

Walnut Filling:
• 300g walnuts, roughly chopped
• 150g caster sugar
• 120g butter, melted
• 150g honey
• 5 egg yolks
• 100ml cream
• 50ml dark Jamaican rum

Equipment:
23cm / 9in flan tin

Method
For the pâté sucrée, add the flour, butter, sugar and salt to a food processor and blend to a fine crumb. Use a fork to lightly beat the egg and then add to the food processor and pulse to bring the pastry together. Wrap in clingfilm and chill for 1 hour in the fridge.

To  make the butterscotch sauce, place the butter, sugar and golden syrup in a saucepan over a medium heat, stirring to dissolve the sugar. Continue to cook to a smooth and shiny syrup. Carefully add the cream (as it will splutter) and stir to combine. Bring to a gentle bubble then simmer for 3 minutes. Add the rum and remove from the heat.

Preheat the oven to fan 160°C / fan 325°F / gas mark 4.

Roll out the pastry to 2-3mm / 0.1in thick and use to line a 23cm / 9in flan tin. Chill for at least 30 minutes in the fridge.

To make the walnut filling, gently mix together the walnuts, sugar, butter, honey, egg yolks, cream and rum in a large bowl. Pour the mixture into the prepared pastry and bake in oven for 50-60 minutes or until golden brown and set with a slight wobble.

Allow to set for at least 1 hour before serving with the butterscotch sauce and if desired some vanilla ice-cream.

Cook more from this book
Twice baked cheese souffles
Smoked cod cakes

Buy this book
€35 Order from mywildatlantickitchen.com 

(The book is also available from Amazon
My Wild Atlantic Kitchen: Recipes and Recollections
£35, Maura O’Connell Foley)

Read the review
Coming soon

Persian Lamb Neck Soup by Matty Matheson

Persian Lamb Neck SoupServes 6
PREP TIME: 4 HOURS, PLUS 2 HOURS INACTIVE TIME

I have only had this soup at a restaurant once in my life, and I loved it so much but have not gone back to where I had it because we had to sit on the floor pretty much, and if you know me, the big dog eating some interactive soup on the floor isn’t the greatest. So, make this in your home, and yes, it’s a lot of work, and some recipes are easy and some are hard, and now let’s get to work and build out a beautiful soup that’s gonna make your tongue explode in joy!

3 pounds (1.3 kg) lamb necks
1 tablespoon ground turmeric
1 teaspoon kosher salt, plus more as needed
1 teaspoon freshly cracked black pepper
300 g diced white onions
60 ml tomato paste
2 quarts (2 L) lamb stock, or water
4 Yukon Gold potatoes, peeled and quartered
150 g canned chickpeas, drained
150 g canned white beans, drained
60 ml lemon juice, plus more as needed
50 g garlic, thinly sliced
60 ml white vinegar
2 tablespoons sugar
6 flatbreads
180 ml plain Greek yogurt
40 g mint leaves
60 g tarragon leaves

Place the lamb necks in a shallow container and season with the turmeric, salt, and pepper. Keep in the refrigerator for 3 hours.

Preheat the oven to 200°C.

Place the lamb necks on a baking sheet fitted with a wire rack. Brown them in the oven for 30 minutes, then remove from the oven and transfer them to large Dutch oven, reserving the rendered lamb fat from the bottom of the baking sheet. Add the onions, tomato paste, and lamb stock. Bring to a boil over high heat, stirring to dissolve the tomato paste. Cover the pot, reduce heat to low, and simmer for 2 hours.

Add the potatoes, chickpeas, white beans, and lemon juice; simmer until the meat and potatoes are fork-tender, about 1 hour. Taste for seasoning; the broth should be tangy and bright. Remove from heat and let rest for 10 minutes.

Put the garlic in a small bowl. In a small saucepan, combine the vinegar, 60 ml water, and sugar and bring to a boil; pour over the garlic. Cool and reserve for the soup.

Use a slotted spoon to remove meat, beans, and potatoes from the broth and transfer them to a large bowl. Use a fork to pull the meat off the bones; discard the bones. With a potato masher, mash the meat, beans, and potatoes into a soft uniform paste. If it’s a little dry, add broth and continue mashing until fully broken down and emulsified.

Strain the stock through a fine chinois or strainer and heat it back up in the pan. Season with salt and lemon juice. This is a two-part meal: the broth and the meat paste. Serve the broth in soup bowls drizzled with rendered lamb fat and sprinkled with the pickled garlic. Put the meat paste in a serving bowl, spread it on the roti, dollop yogurt over it, and top with the herbs. Eat the little meat breads with your hands.

Cook more from this book
Green Curry Beef Ribs
Molasses Bread in an Apple Juice Can 

Read the review 

Buy this book
Matty Matheson: Home Style Cookery
£25, Abrams

Molasses Bread in an Apple Juice Can by Matty Matheson

SERVES: 8
PREP TIME: 1 HOUR, PLUS 1 HOUR INACTIVE TIME

Apple juice in cans are gonna fly off the shelves from this day on, I swear. Every family in the Maritimes has made a version of this recipe. Making cylinder-shape bread using a large apple juice can is scrappy and great for recycling. You get to drink shitty apple juice, which is great as well. Please make the eff ort to find these cans; it’ll make this process way funnier and an instant family tradition that your kids will love forever.

240 ml warm water (46 to 53°C)
1 teaspoon granulated sugar
1 tablespoon active dry yeast
160 ml molasses, such as Crosby’s Fancy, plus more for serving
90 g old-fashioned rolled oats
240 ml hot water
300 g whole-wheat flour
660 g all-purpose flour
2 teaspoons kosher salt
2 (1.05 L) cans Allen’s Apple Juice, or other similar-size cans
Unsalted butter
Sea salt (optional)

In a medium bowl, combine the warm water and sugar, then sprinkle the yeast over the top. Let sit for 8 to 10 minutes, or until the mixture becomes foamy and fragrant; this indicates the yeast is active and alive.

In another medium bowl, combine 160 ml of molasses and the oats; stir to incorporate. Pour the hot water into the molasses and oat mixture, stir with a whisk, then add the yeast mixture; whisk to fully incorporate. Transfer to the bowl of a stand mixer fitted with the dough hook attachment. With the mixer running, add the whole-wheat flour slowly (so you don’t get flour all over yourself). Then add the all-purpose flour and kosher salt and let it come together. Raise the speed to medium and knead the dough for 2 minutes, or until the dough just comes together. Turn the dough out onto a clean work surface and cut in half.

Grease the inside of the cans with butter. Transfer the dough halves into the cans. Drape a kitchen towel over them and place in a warm area for 1 hour, or until the dough is double in size.

While the dough is rising, preheat the oven to 175°C.

Place the cans on a baking sheet and bake for 45 minutes, or until the bread has a crispy shell and you can puncture the centre with a wooden skewer and it comes out clean.

Set the cans on a wire rack and let the bread cool for 30 minutes. Remove the bread from the cans and let cool further. Once you’re ready to dig in, slice a thumb-wide piece and smother with cold butter, molasses, and a pinch of sea salt, if you like, for a real treat. Wrap leftovers in plastic wrap and store in the fridge for up to a week. After a week, the bread can be turned into bread pudding (see my first cookbook for the recipe).

Cook more from this book
Green Curry Beef Ribs 
Persian Lamb Neck Soup

Read the review 

Buy this book
Matty Matheson: Home Style Cookery
£25, Abrams